Auto-Refund Configuration & Operation Guide

Auto-refund automatically returns eligible funds to user addresses. This document covers configuration, prepaid account setup, strategy configuration, and the complete refund creation workflow.
Auto-refund involves on-chain operations that incur Gas Fees. The platform can configure refund fees based on business requirements.
Tutorial Objectives
This tutorial guides you through the complete auto-refund workflow: prerequisite verification, configuring the refund batch transfer contract, enabling the prepaid account, configuring withdrawal strategies, creating auto-refunds, and verifying refund results.
Prerequisites
Before using auto-refund, please confirm:
- The backend Strategy Platform is enabled
- The Signer Machine has been configured with the project team
- The project team has provided the refund batch transfer contract address for the corresponding network
- At least two admin wallets with multi-signature permissions are prepared
Admin wallets must be Web3 decentralized wallets, not exchange wallets. They must be able to connect and sign transactions.
Overall Workflow
- Configure the refund batch transfer contract
- Enable the prepaid account
- Configure the fund withdrawal (distribution) strategy
- Create auto-refund
- Verify refund results
Part 1: Basic Configuration
1. Configure the Refund Batch Transfer Contract
First, you need to configure the batch transfer contract address provided by the project team as the hot wallet for refunds through the multi-signature mechanism.
1.1 Initiate Hot Wallet Address Modification
Log in to the backend using Admin Wallet A, navigate to:
System Configuration → Multi-Signature Management → Modify
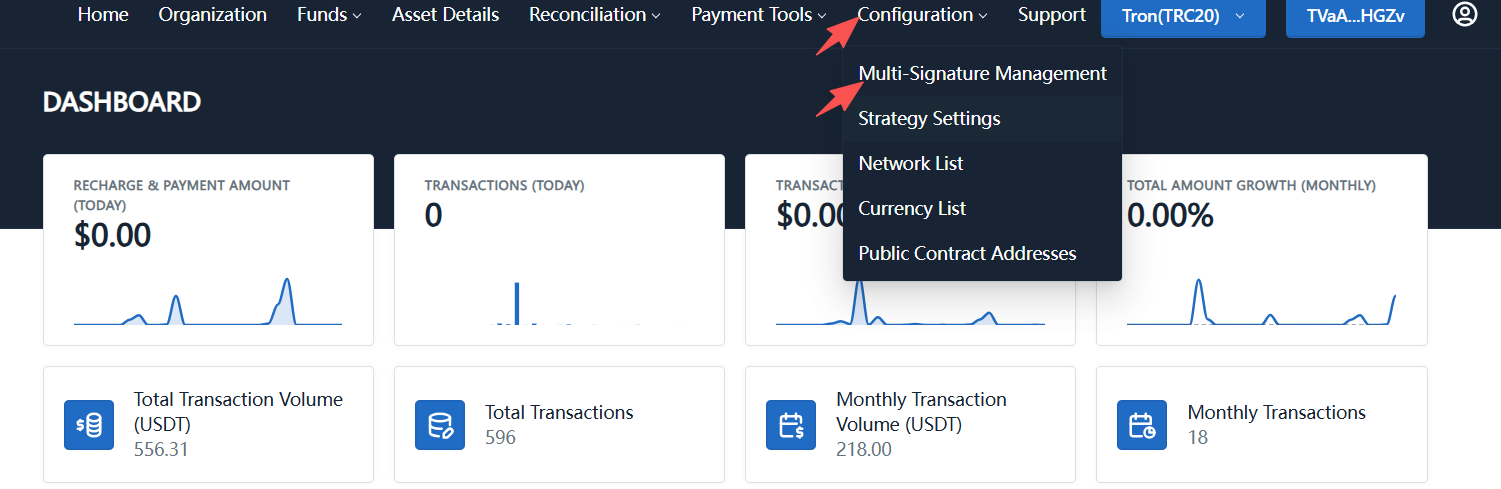
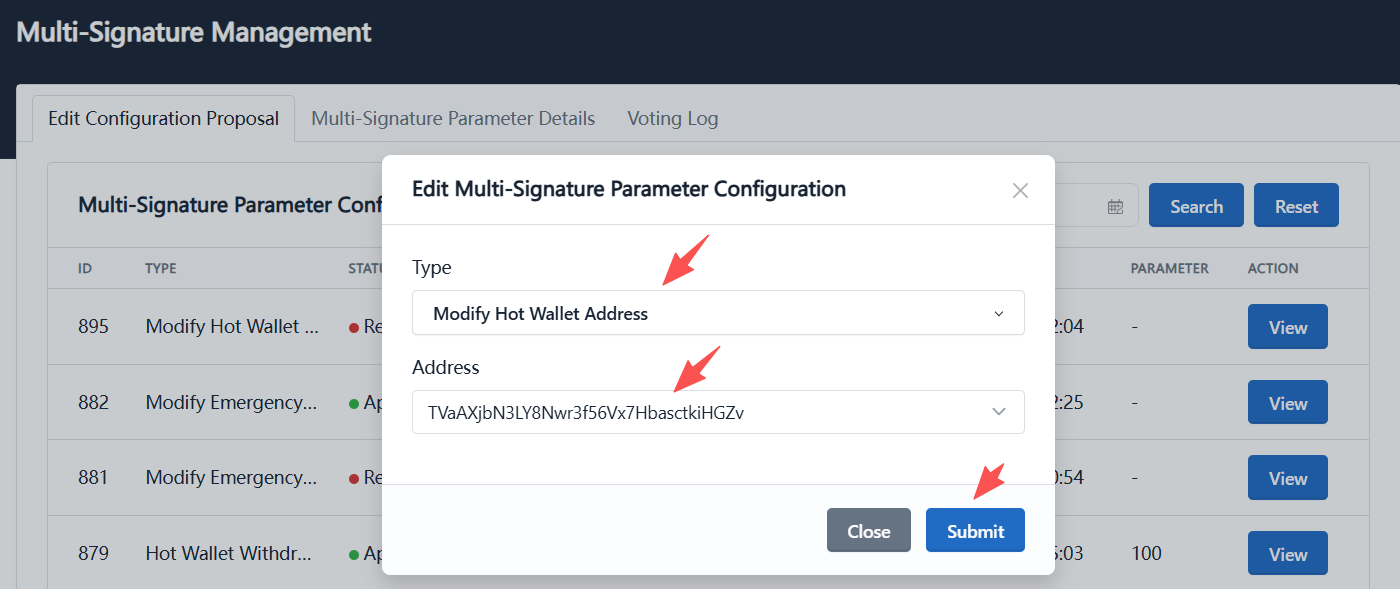
On the modification page:
- Category: Select Modify Standard Hot Wallet Address
- Address: Enter the batch transfer contract address provided by the project team
- Click Submit
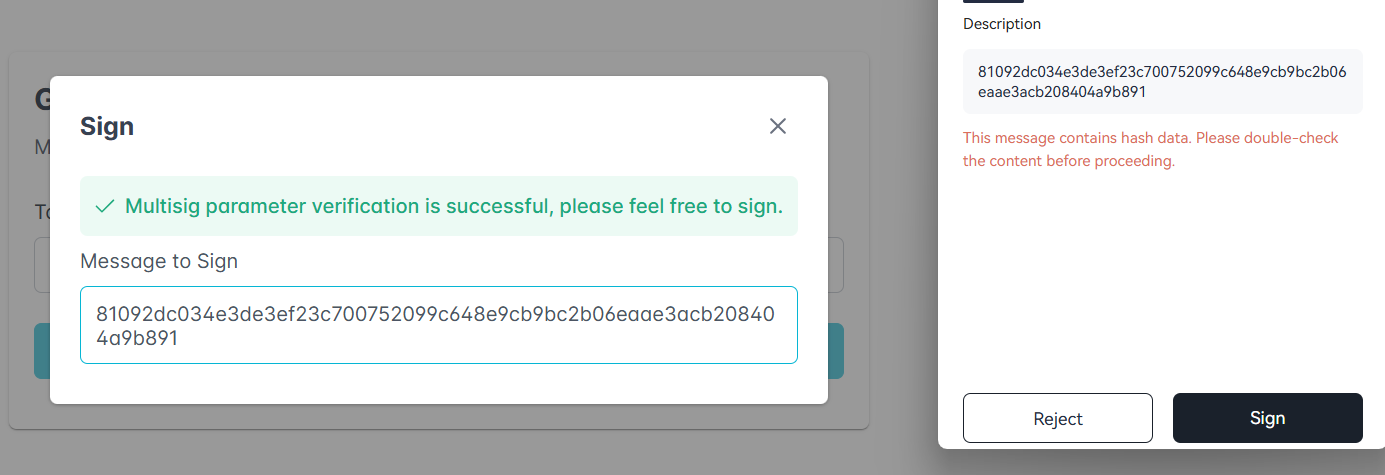
After submission, the proposal will enter a pending approval state and require another administrator to complete multi-signature approval.
1.2 Multi-Signature Approval
Log out and log back in using Admin Wallet B.
Navigate to:
System Configuration → Multi-Signature Management
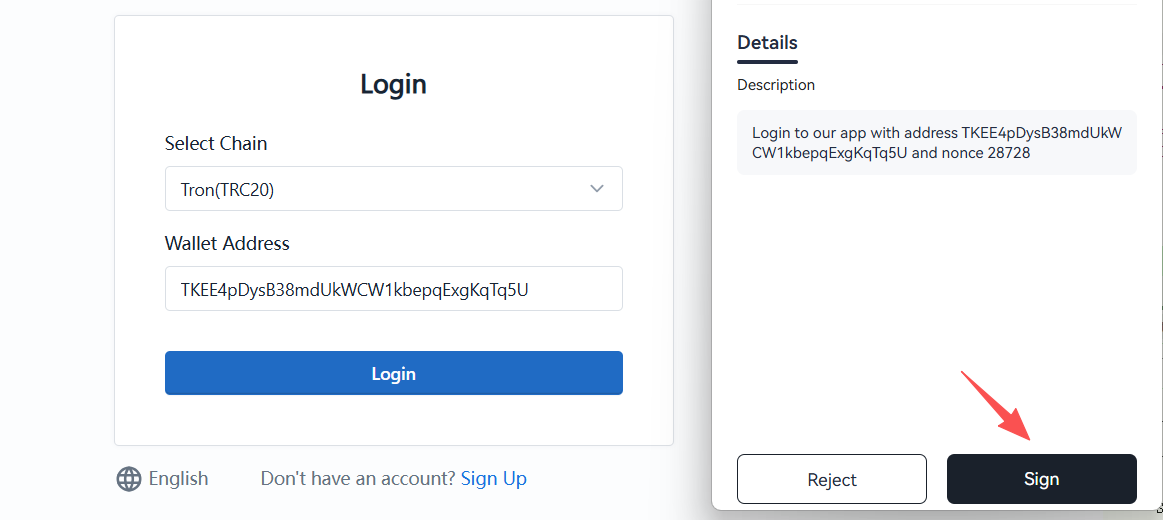
Find the Modify Standard Hot Wallet Address proposal you just submitted and click Approve.
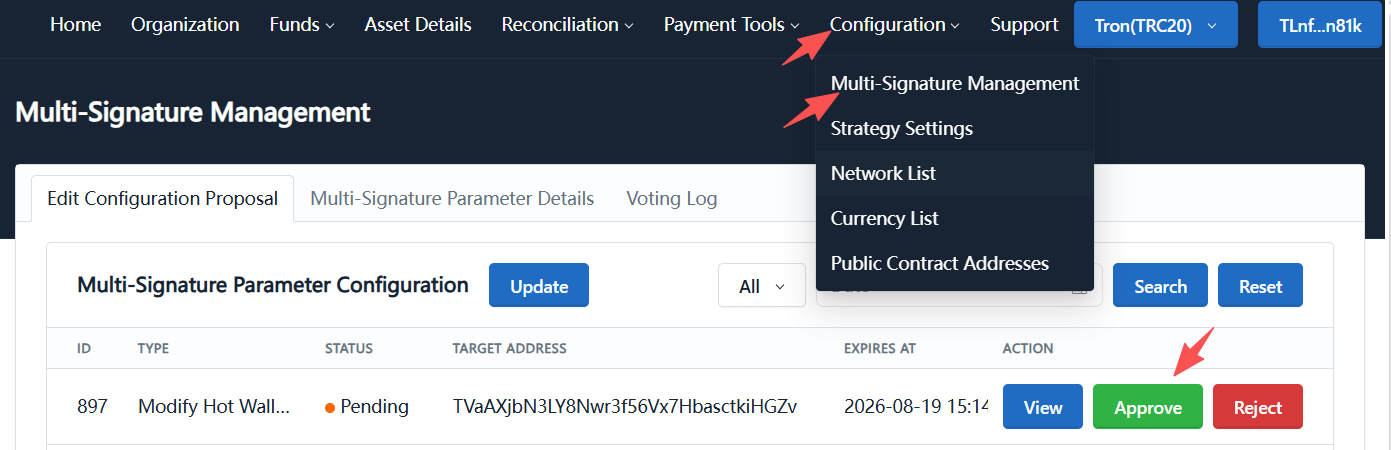
When the wallet prompts a signature request, confirm the transaction information and click Sign.
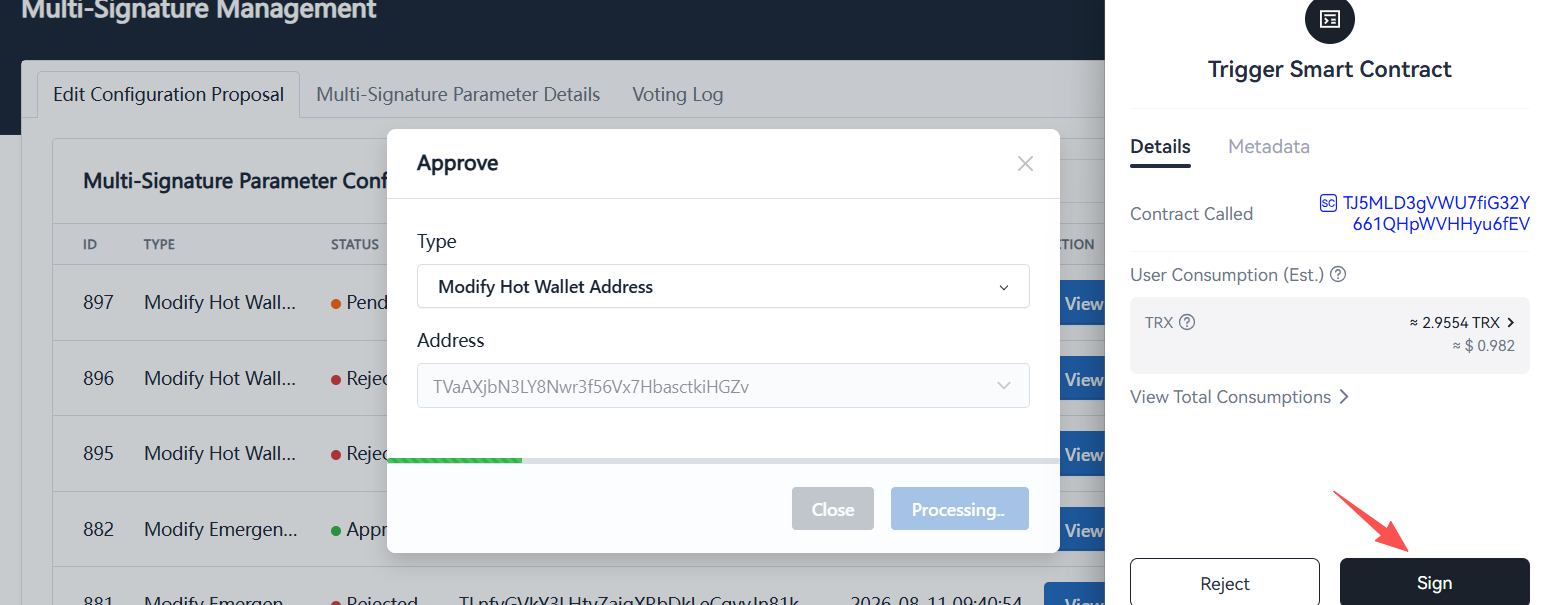
After the signature and on-chain transaction confirmation are complete, the batch transfer contract is configured as the hot wallet for refunds.
The multi-signature mechanism ensures that critical configuration changes require confirmation from multiple administrators, enhancing fund security.
2. Enable the Prepaid Account
The prepaid account is the foundation for automatic strategy execution and must be enabled and funded first.
Instructions
Log in to the backend using an admin wallet and navigate to:
System Configuration → Strategy Configuration → Prepaid Account
Enable the Prepaid function.
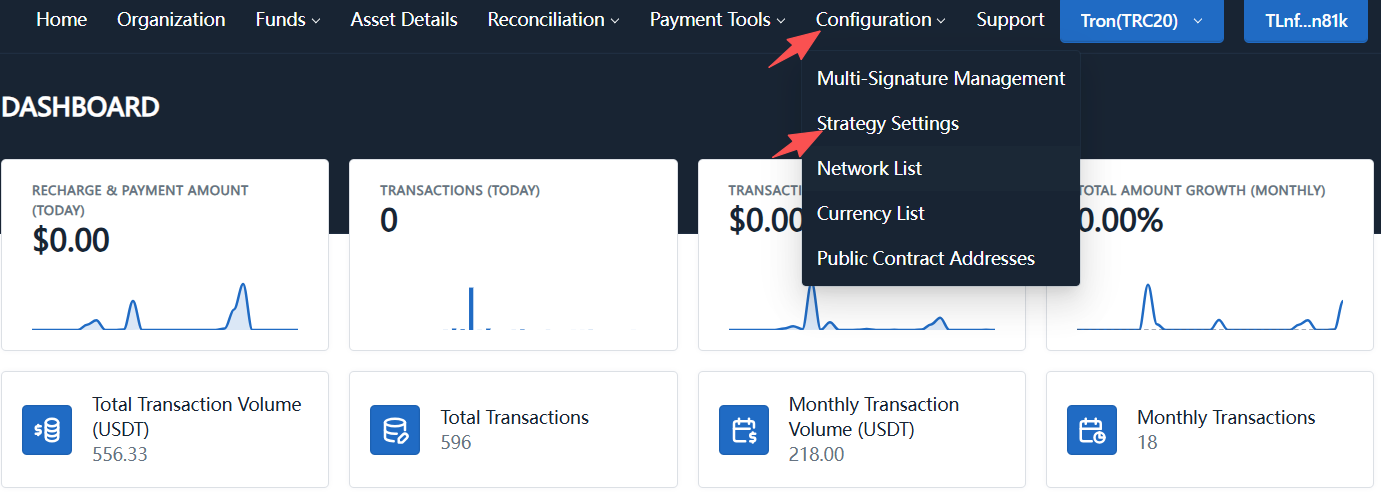
Click Deposit, select the corresponding network and USDT, and send funds to the address provided on the page.
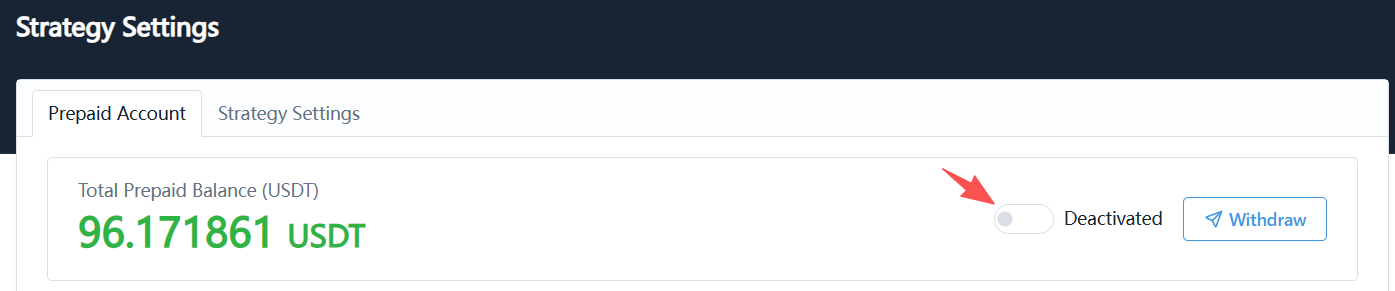
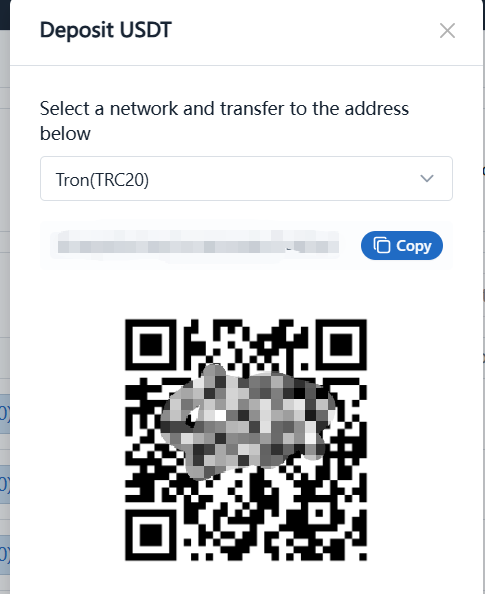
Please maintain sufficient prepaid account balance to avoid affecting strategy execution.
The prepaid account must be enabled and funded before configuring any automatic strategies.
3. Configure the Fund Withdrawal (Distribution) Strategy
The withdrawal strategy controls the automatic fund distribution process from the hot wallet to user addresses.
Instructions
Navigate to:
System Configuration → Strategy Configuration → Strategy Settings → Fund Withdrawal (Distribution) Strategy
Configure:
- Strategy Status: Enabled
- Maximum Withdrawal (Distribution) Wallets per Transaction: 1
Click Save Fund Withdrawal (Distribution) Strategy.
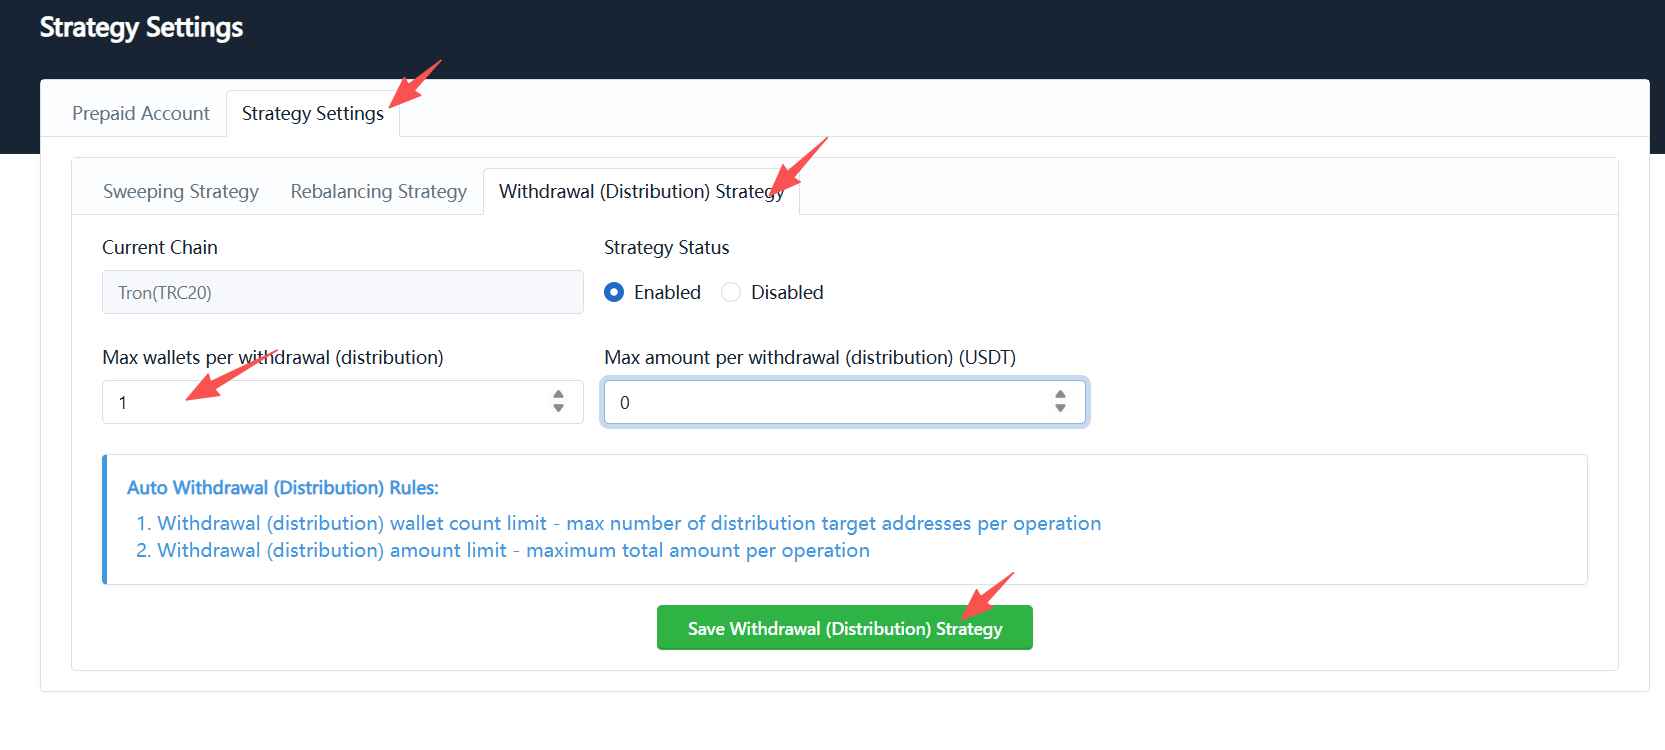
The fund withdrawal (distribution) strategy must be enabled, otherwise the final step of auto-refund cannot execute normally.
Part 2: Create Auto-Refund
4. Create Auto-Refund
After completing the basic configuration, you can create auto-refund tasks.
Instructions
Navigate to:
Asset Management → Refund → Auto-Refund
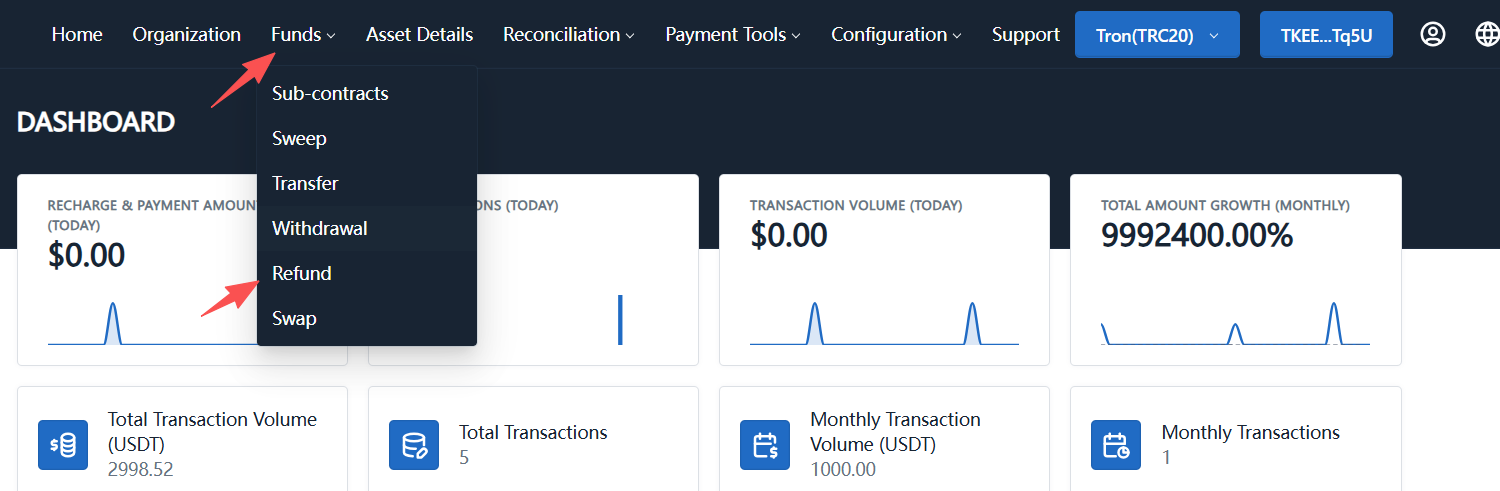
Click Add.
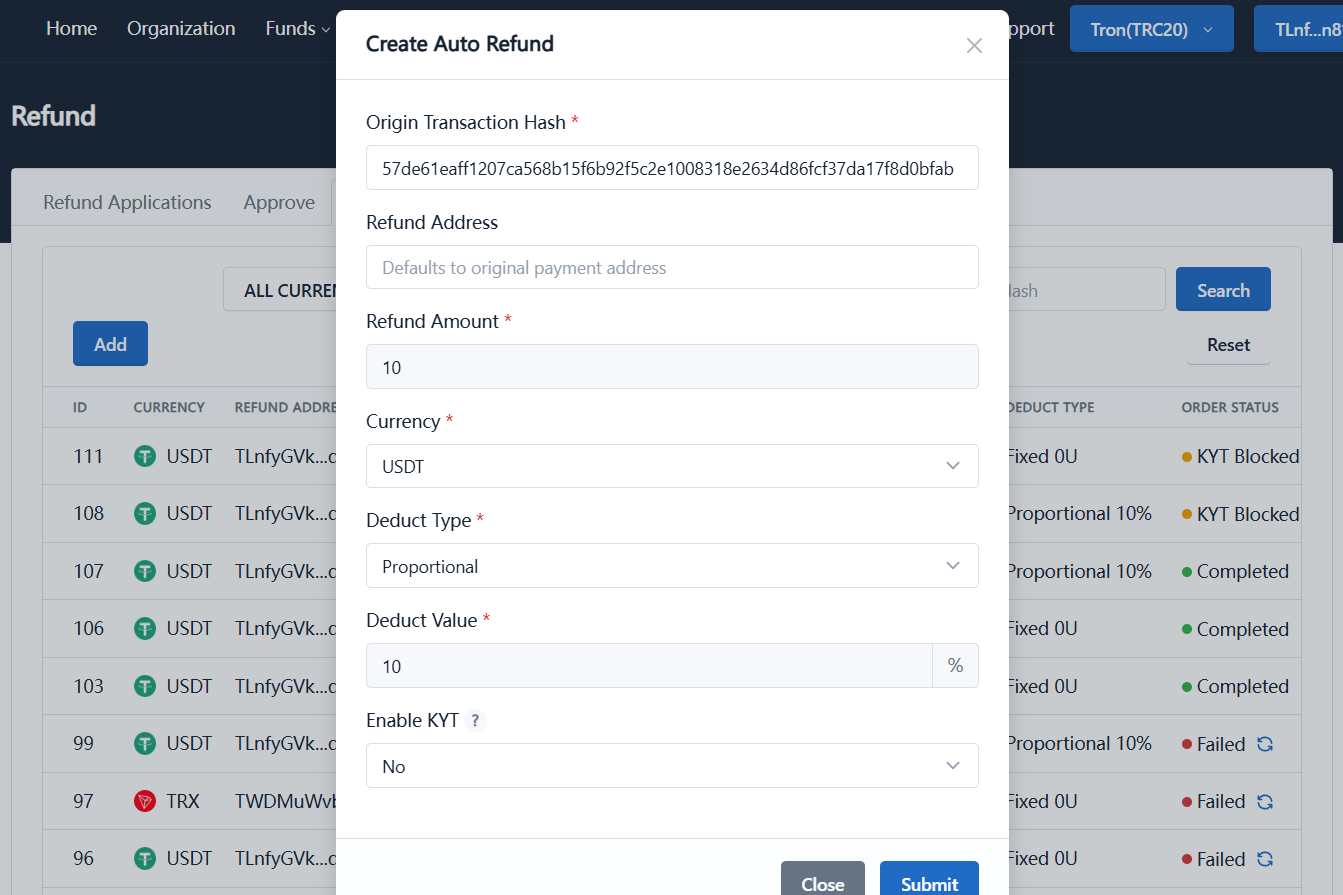
Fill in the refund information:
| Field | Description |
|---|---|
| Original Transaction Hash | Enter the TxHash of the original transaction to be refunded |
| Refund Address | If left empty, defaults to the original payment address |
| Refund Amount | Enter the refund amount |
| Currency | Select the corresponding refund currency |
| Fee Type / Fee Value | Configure platform refund fees based on business requirements |
After confirming the information is correct, click Submit.
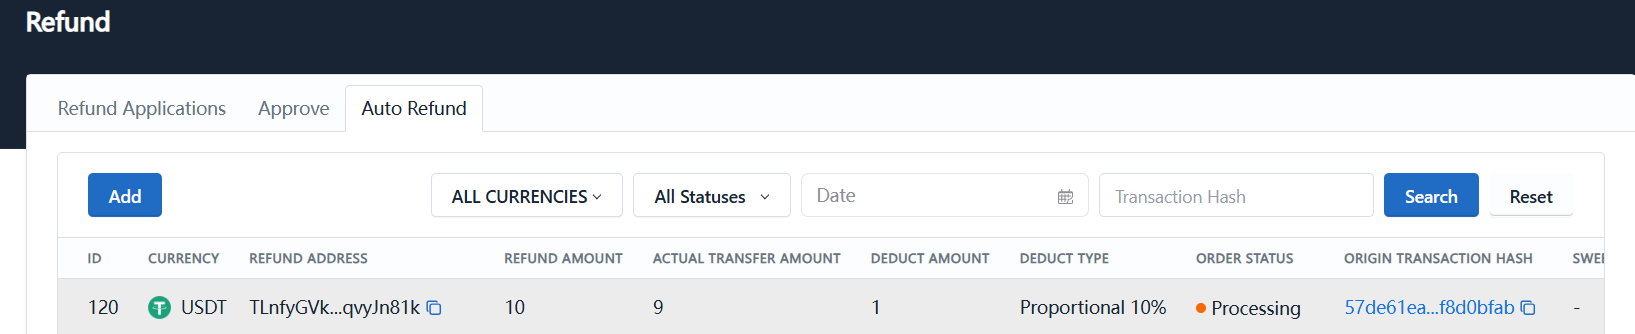
- If the refund address is left empty, funds will be returned to the original payment address
- Fee type and fee value are used to configure platform fees and can be set based on business requirements
5. Auto-Refund Fund Flow
After successful submission, the system automatically executes the refund according to the configured strategy:
Sweeping, withdrawal, and refund are on-chain operations that incur corresponding Gas Fees.
If the platform needs to charge users refund fees, they can be configured via Fee Type / Fee Value when creating the auto-refund.
On-chain transactions require block confirmation, and the backend may not update the status immediately. Please wait patiently or refresh the page to view the latest results.
Part 3: Key Reminders
- The prepaid account must be enabled and funded before configuring any automatic strategies
- Admin wallets must be Web3 decentralized wallets
- On-chain transactions require block confirmation; the backend may not update immediately
- Refund fees can be configured based on business requirements when creating refunds
- Ensure sufficient prepaid account balance to avoid affecting strategy execution
Part 4: Completion Checklist
- Strategy Platform enabled
- Signer Machine configured
- Batch transfer contract configured as hot wallet
- Prepaid account enabled and funded
- Fund withdrawal (distribution) strategy enabled
- Withdrawal wallet count set to 1
- Auto-refund information filled correctly
- Refund results verified