Tutorial on Batch Creating Sub-Contracts for Payments

This document describes how to rapidly batch-create TRON sub-contracts for payment business. The core approach is: first activate TRX currency in the admin console, then generate sub-contract addresses by creating payment orders, and finally deploy the contracts by transferring a small amount of TRX (approximately 1.277 TRX, valued at around 0.5 USDT) to complete batch initialization at minimal cost.
Use Cases
- Payment business based on the TRON (TRC20) network
- Merchants need to pre-provision large quantities of payment-collection sub-contract wallets to handle high-concurrency payment demands
- Desire to reduce batch sub-contract creation costs by paying gas fees in TRX
Overall Process Flow
| Step | Operation | Executor |
|---|---|---|
| 1 | Enable TRX currency in admin console (wallet signature confirmation) | Admin |
| 2 | Call API to create payment order | Merchant System |
| 3 | Call API to update payment info to TRX (currencyId: 1) | Merchant System |
| 4 | Retrieve generated sub-contract address from order details | Merchant System |
| 5 | Transfer 0.01 TRX to the address | Operations/Finance |
| 6 | Wait for on-chain confirmation; sub-contract automatically deploys | — |
| 7 | Repeat steps 2~6 for batch operations | Merchant System |
| 8 | Disable TRX currency from admin console upon completion | Admin |
Each sub-contract transfer costs approximately 1.277 TRX (equivalent to around 0.5 USDT), comprising: 0.01 TRX transfer amount, 0.267 TRX bandwidth fee, and 1 TRX new address activation fee. Compared to deploying contracts directly using USDT, this significantly reduces gas costs.
Detailed Steps
1. Enable TRX Currency in Admin Console
Log in to the admin console using an admin wallet, navigate to "System Configuration → Currency List", add the TRX currency, and confirm via wallet signature.
Admin console URL: https://adm.payprotocol.network/login
1.1 Select the currency to enable
Click the "Manage Currencies" button. In the modal that appears, select TRX (TRX) from the dropdown list.
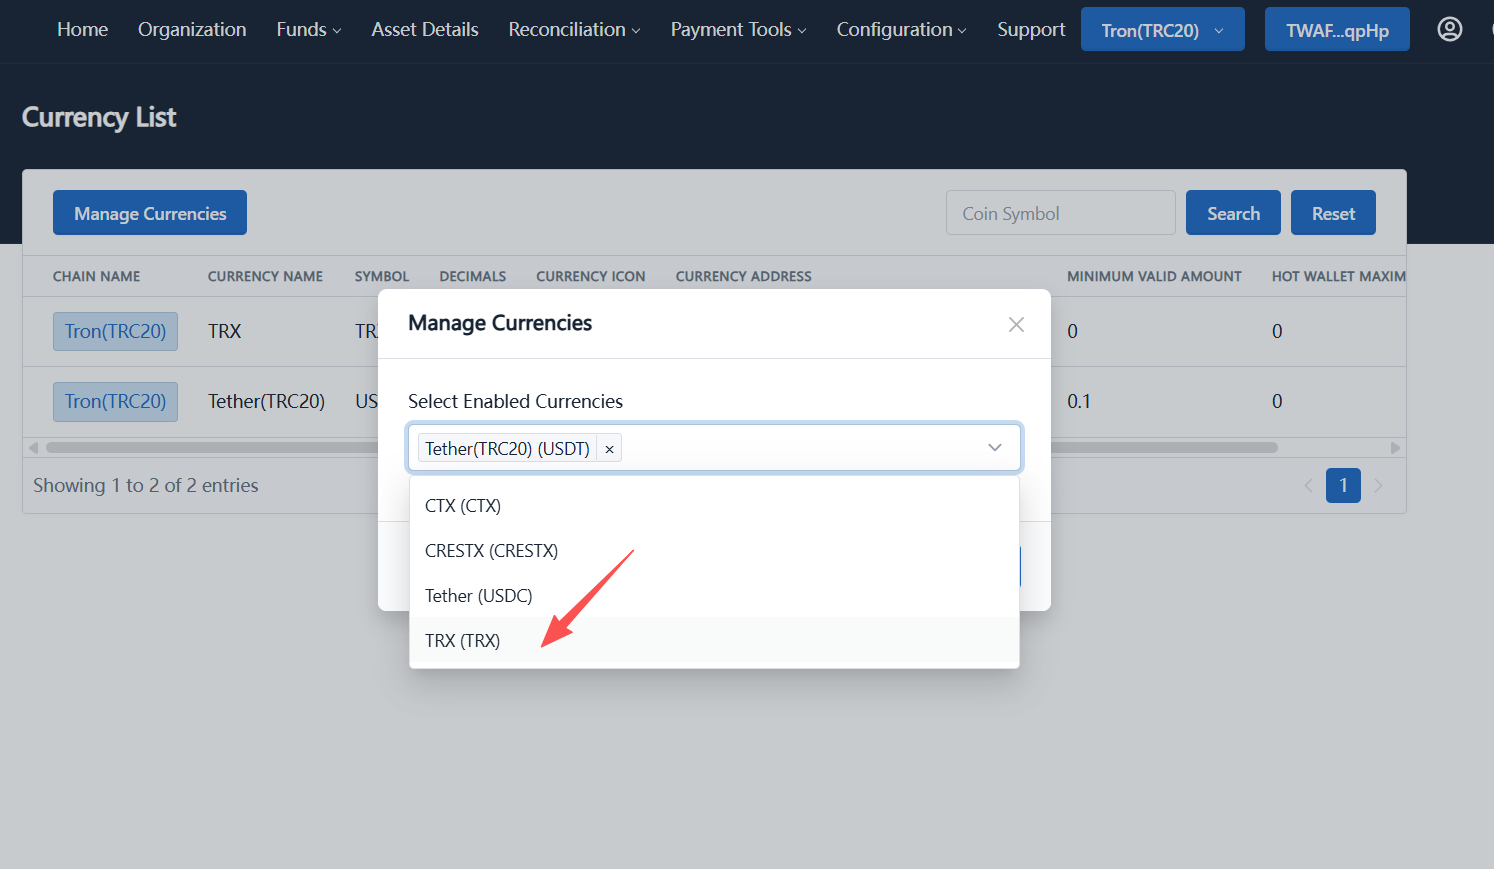
Figure 1: Select TRX (TRX) from the dropdown in the "Manage Currencies" modal
1.2 Submit the activation request
After confirming that the selected currencies include Tether(TRC20) (USDT) and TRX (TRX), click the "Submit" button.
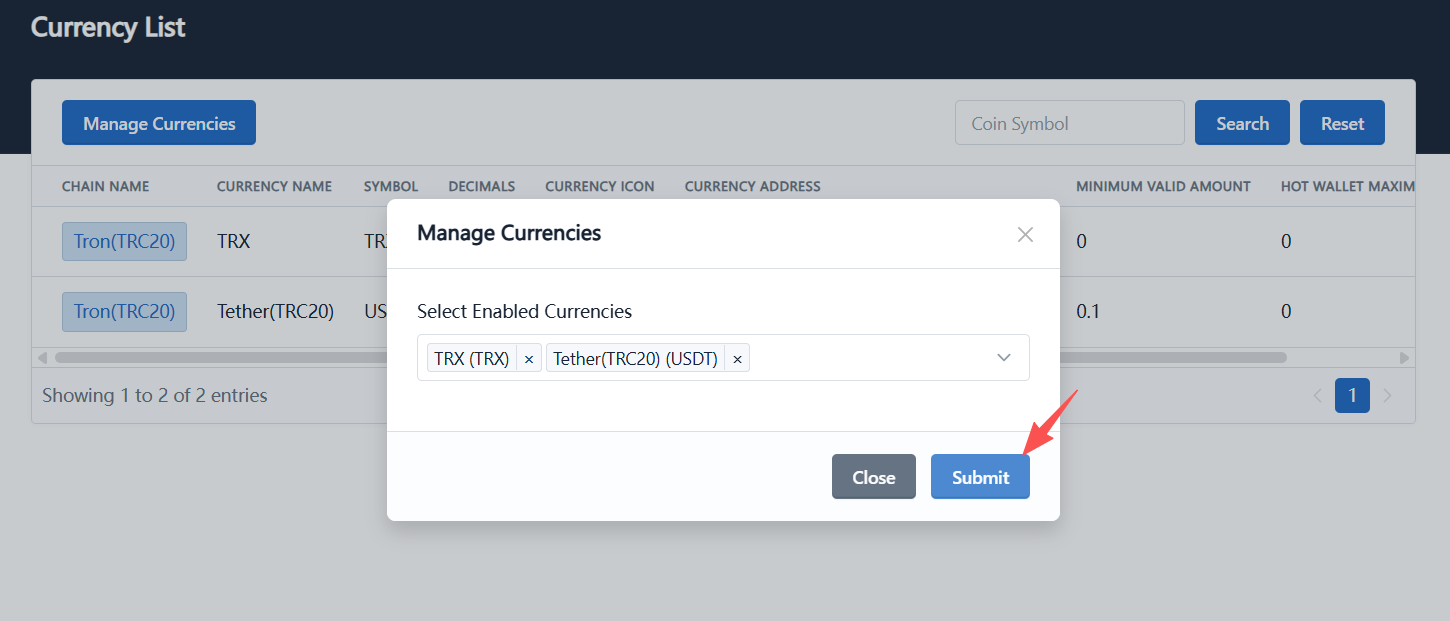
Figure 2: Click "Submit" after confirming the selected currencies
1.3 Confirm wallet signature
The system will trigger your wallet to display a "Trigger Smart Contract" signature request, with an estimated gas fee of approximately 2.4785 TRX. Click the "Sign" button to complete the on-chain operation.
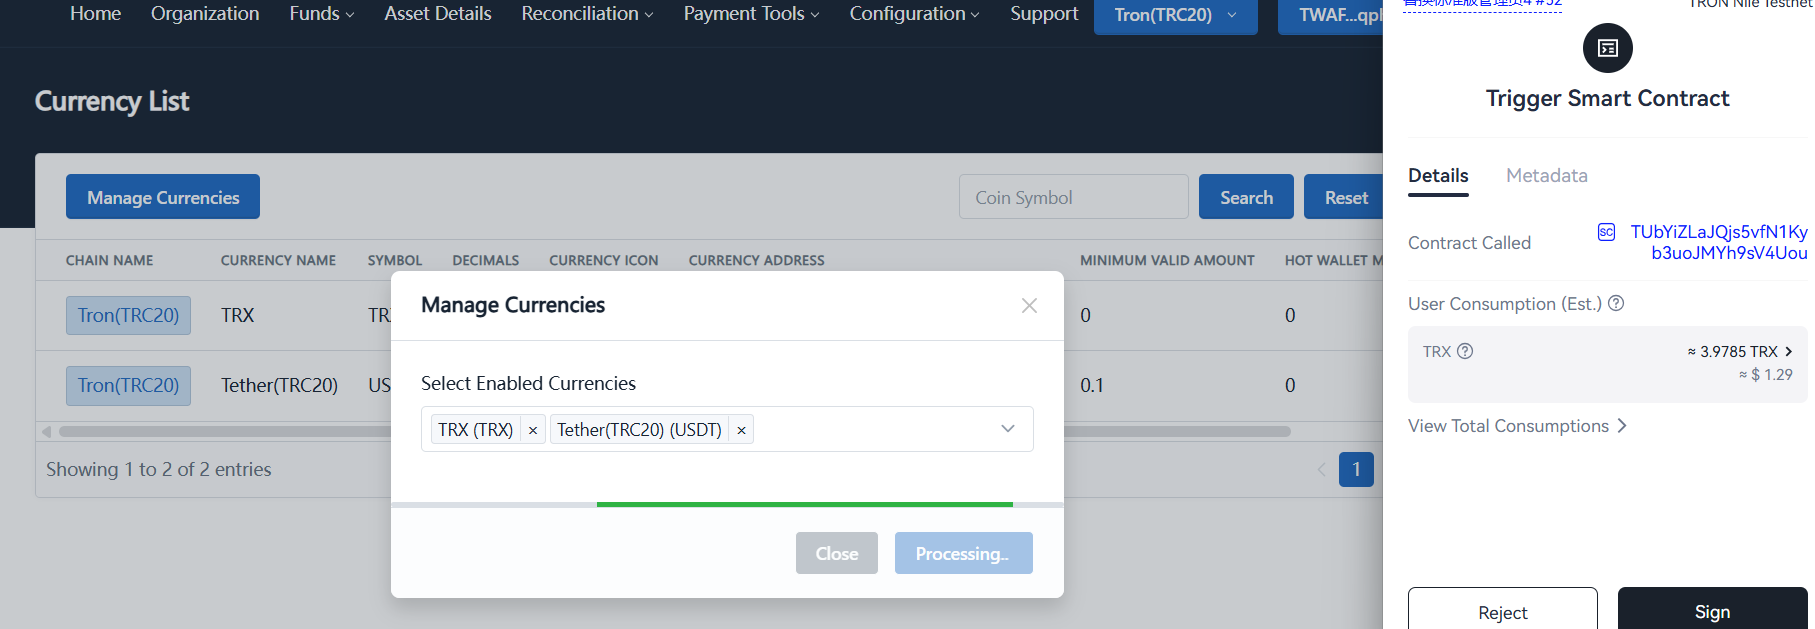
Figure 3: Click "Sign" in the wallet popup to complete TRX currency activation
After successful signature, the TRX currency record will appear in the currency list, indicating successful activation. The system now has the capability to process TRX payments, and you can proceed to the next steps.
2. Call API to Create Payment Order
Create a payment order through the merchant API. Each order will correspond to an independent sub-contract wallet address.
API Documentation: Create Payment Order
Request Example
POST /payment/order/create
Content-Type: application/json

{
  "chainId": 1,
  "description": "A sample order",
  "isLegalTender": 0,
  "notifyUrl": "https://www.payment.com/api/notify",
  "outTradeNo": "P2026010100000001",
  "quoteAmount": "0.01",
  "quoteCurrencySymbol": "TRX",
  "redirectionUrl": "https://www.payment.com/order/redirect",
  "tagId": 1
}
Upon successful API call, the response will include the order's unique identifier orderNo, which you'll need for subsequent steps.
It is recommended to loop this API call in your program, using a unique merchantOrderNo (merchant order number) for each call. Add an appropriate delay between calls (e.g., 200~500ms).
3. Update Payment Information to TRX
After the order is created, call the "Update Payment Info" API to switch the order's payment currency to TRX. This is a critical step: by setting currencyId to 1 (TRX), the subsequent 0.01 TRX transfer will trigger sub-contract wallet generation with minimal gas cost.
API Documentation: Update Payment Info
Request Example
POST /payment/payInfo/update
Content-Type: application/json

{
  "chainId": 1,
  "currencyId": 1,
  "outTradeNo": "P2026010100000001"
}
Key Parameters
| Parameter | Description | Example Value |
|---|---|---|
orderNo | Order number returned after step 2 | P2026010100000001 |
currencyId | Currency ID; TRX corresponds to 1 | 1 |
currencyId must be set to 1 (TRX's ID), otherwise subsequent TRX payments will not be recognized as valid. If the call fails, verify that TRX currency was successfully enabled in step 1.
4. Retrieve Sub-Contract Wallet Address from Order
After updating payment information, use the "Query Payment Order Details" or "Query Payment Page Info" API to retrieve the sub-contract wallet receiving address associated with the order.
The payment collection sub-contract is the sub-contract wallet address that will be deployed. Save this address to your batch task list for transferring 0.01 TRX in subsequent steps.
5. Transfer 0.01 TRX to the Sub-Contract Address
Using any exchange or wallet (e.g., TronLink, Binance, OKX, etc.), transfer 0.01 TRX to the payment collection sub-contract address obtained in step 4.
6. Wait for Sub-Contract Wallet Deployment
After on-chain confirmation (typically within 1 minute), the system will detect the TRX transfer transaction and automatically trigger the sub-contract deployment logic. Once deployment completes, the new sub-contract wallet is ready to use as an independent payment-receiving address.
Ways to Confirm Sub-Contract Deployment Success
- Query the address via the TRON blockchain explorer (e.g., Tronscan) to see contract creation transaction records
- Receive order status change notifications via the merchant callback interface (
notifyUrl) - Call the "Query Payment Order Details" API again to verify the order status has been updated
7. Batch Looping Operations
Encapsulate steps 2 through 6 in a program loop or batch processing script to batch-generate multiple sub-contract wallets.
8. Disable TRX Currency After Completion
After batch creation is complete, disable TRX currency from the admin console to prevent accidental use of the TRX payment channel for regular payment collection operations.
Steps
- Log in to the admin console using an admin wallet
- Navigate to "System Configuration → Currency List"
- Click "Manage Currencies", then in the dialog that appears, click the "×" next to TRX (TRX) to remove it
- Click "Submit"
- Confirm via wallet signature (similar to step 1.3)
The process for disabling TRX currency is identical to step 1 (enabling currency), with the only difference being: uncheck TRX from the dropdown list. After removal, already-deployed sub-contract wallets remain unaffected and continue functioning normally as payment-receiving addresses.