Shopline Plugin Deployment Guide
Pay Protocol Shopline payment plugin can provide a seamless checkout experience for your customers. This guide will walk you through the steps to deploy the plugin.
0. Prerequisites
- A Shopline store
- A Pay Protocol merchant account, you can read the introduction here.
- Get your merchant API key from Pay Protocol admin console referring to this guide.
1. Add Pay Protocol payment method
The first step is to add Pay Protocol as a manual payment method in your Shopline store.
- Log in to your Shopline admin site, go to Settings in the lower left corner of admin page.
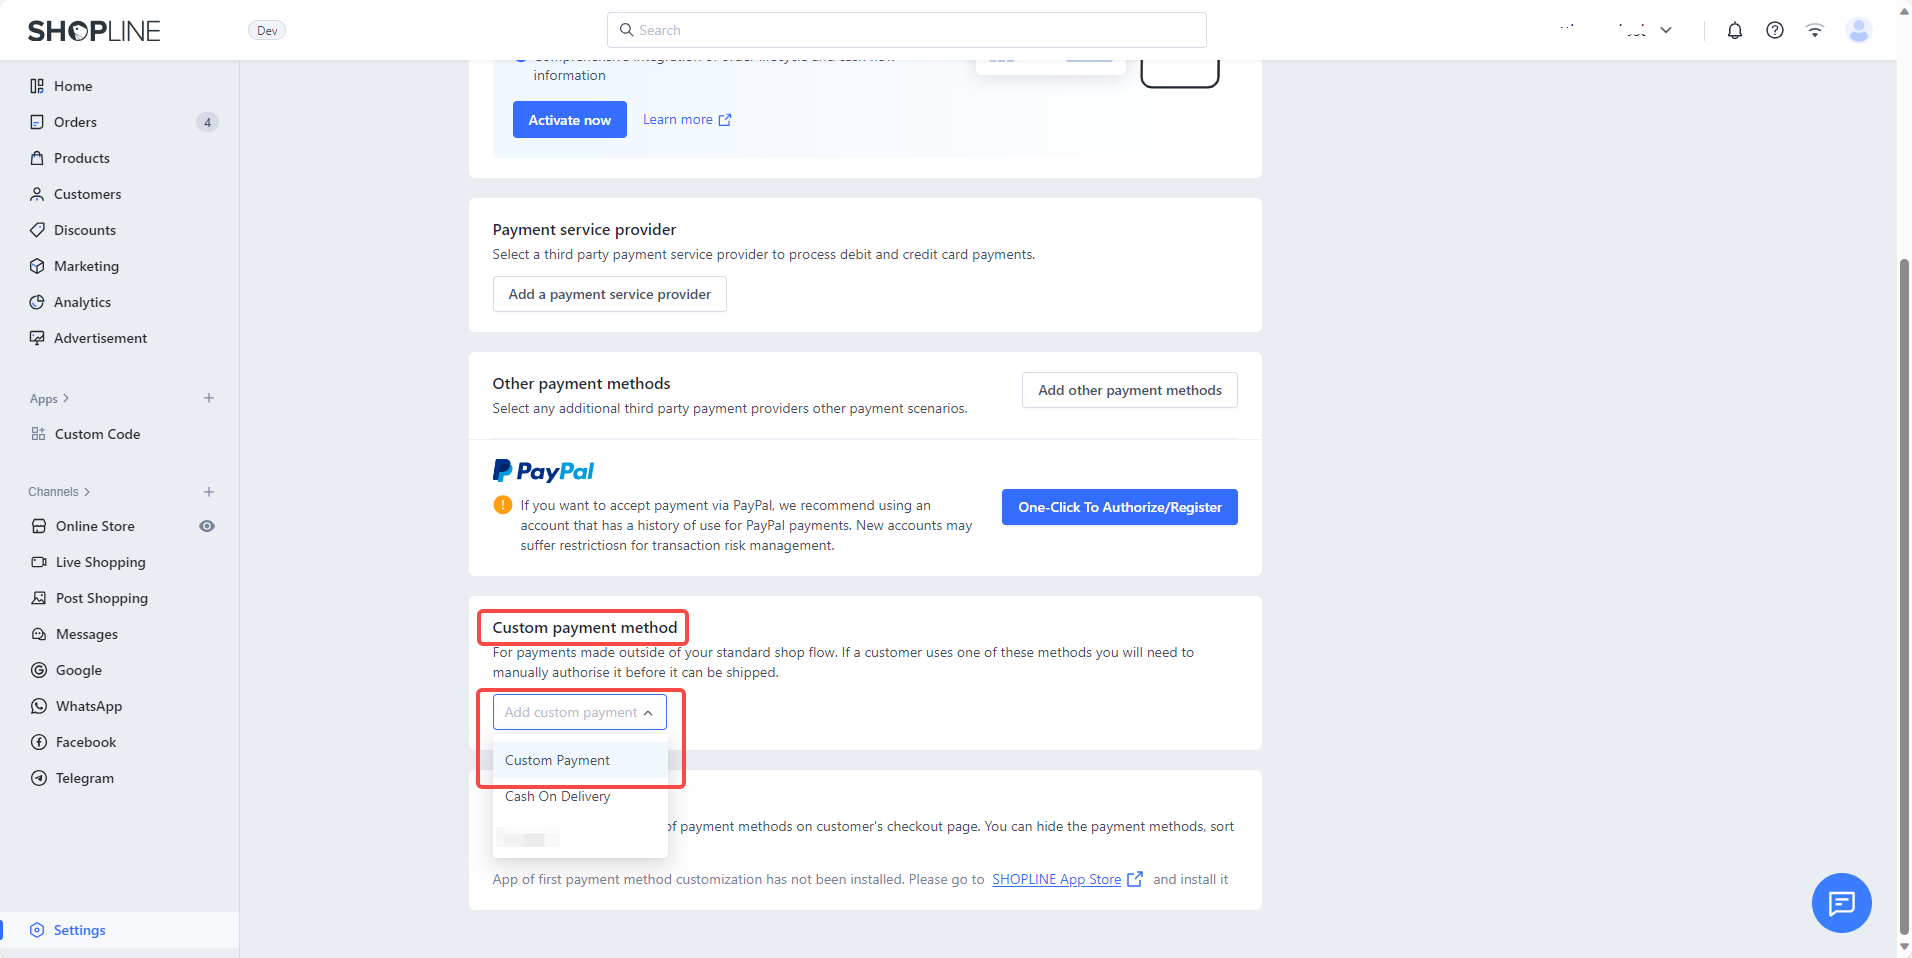
- Click Payments in the Settings page.

- Scroll down to the Custom payment method section, click Add custom payment and select Custom Payment.
- Enter Cryptocurrency Payments - Pay Protocol in the Payment method name field, and fill in the introduction, meanwhile check the Customers don't need to enter billing address option. Then click Activate Custom Payment.
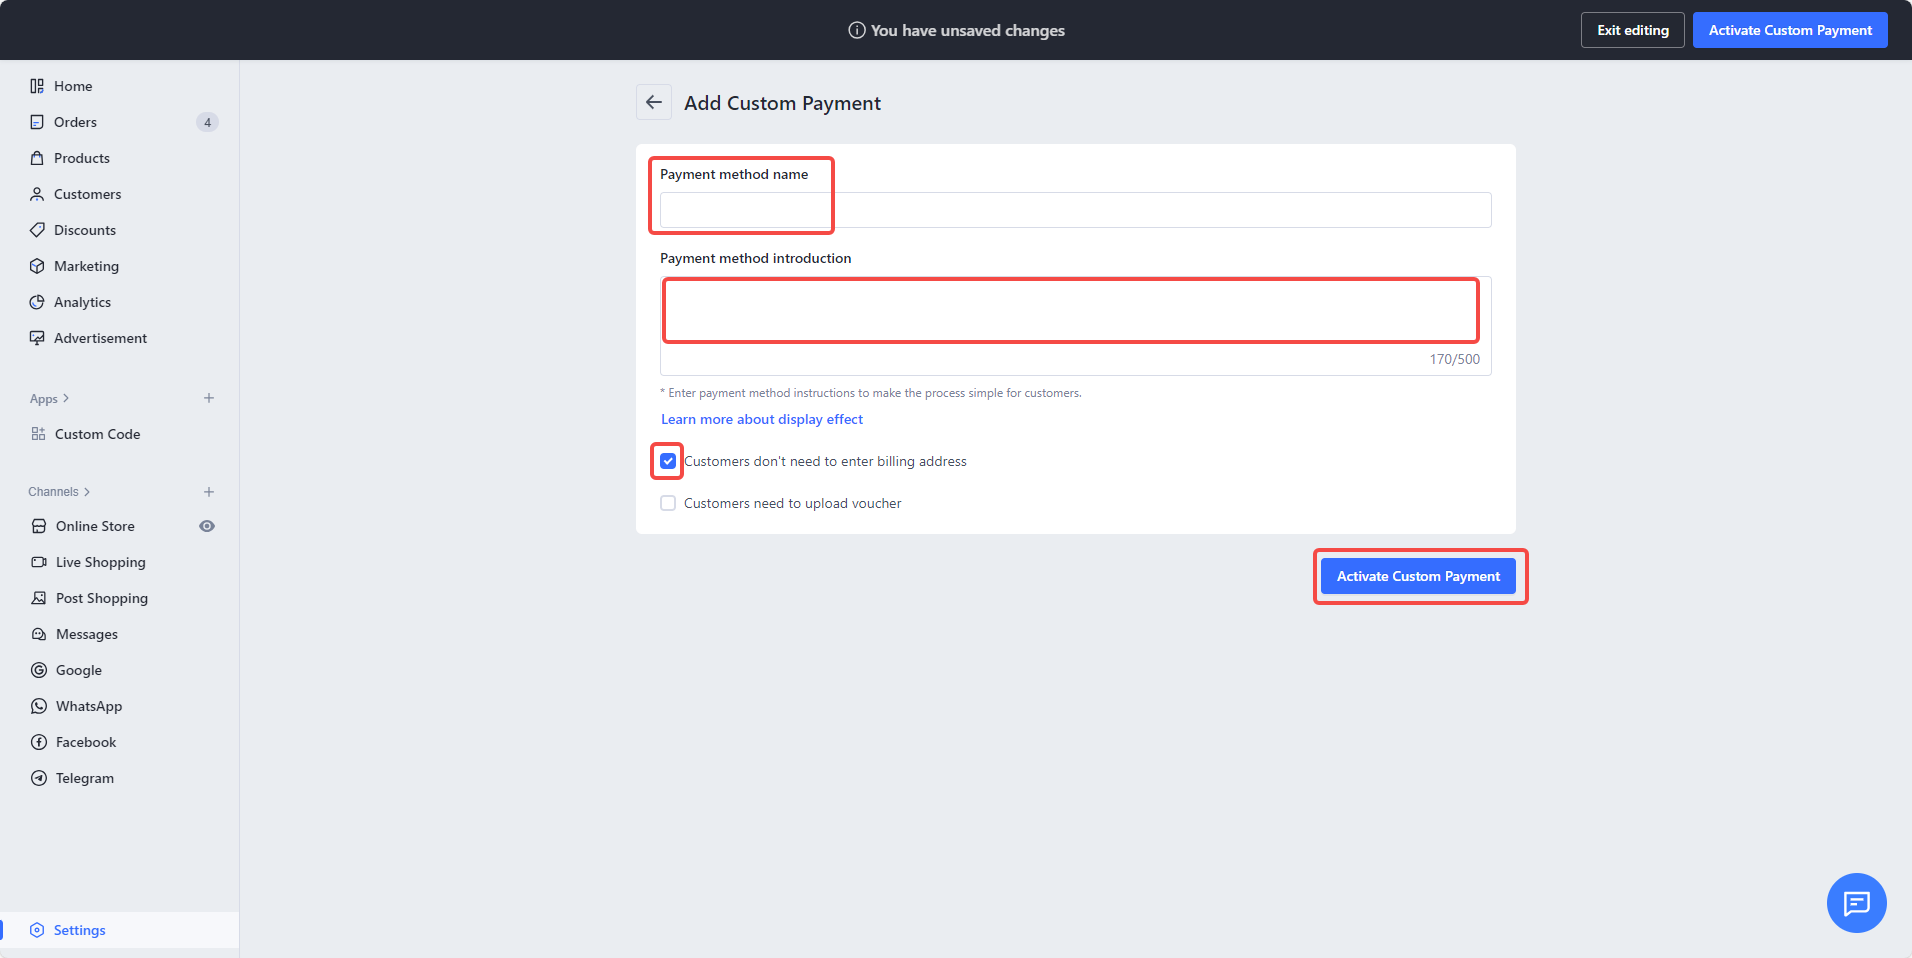
- Payment method introduction: This is the payment method description that will be displayed to your customers. Copy the text below and paste it into the field(you can modify it according to your actual situation).
We accept payments in multiple cryptocurrencies such as ETH, USDT, BNB and TRX. Support MetaMask, Coinbase, TronLink and more wallets. Please tap "Complete Order" to pay.
Please make sure that the payment method name includes Pay Protocol, otherwise the plugin will not work properly.
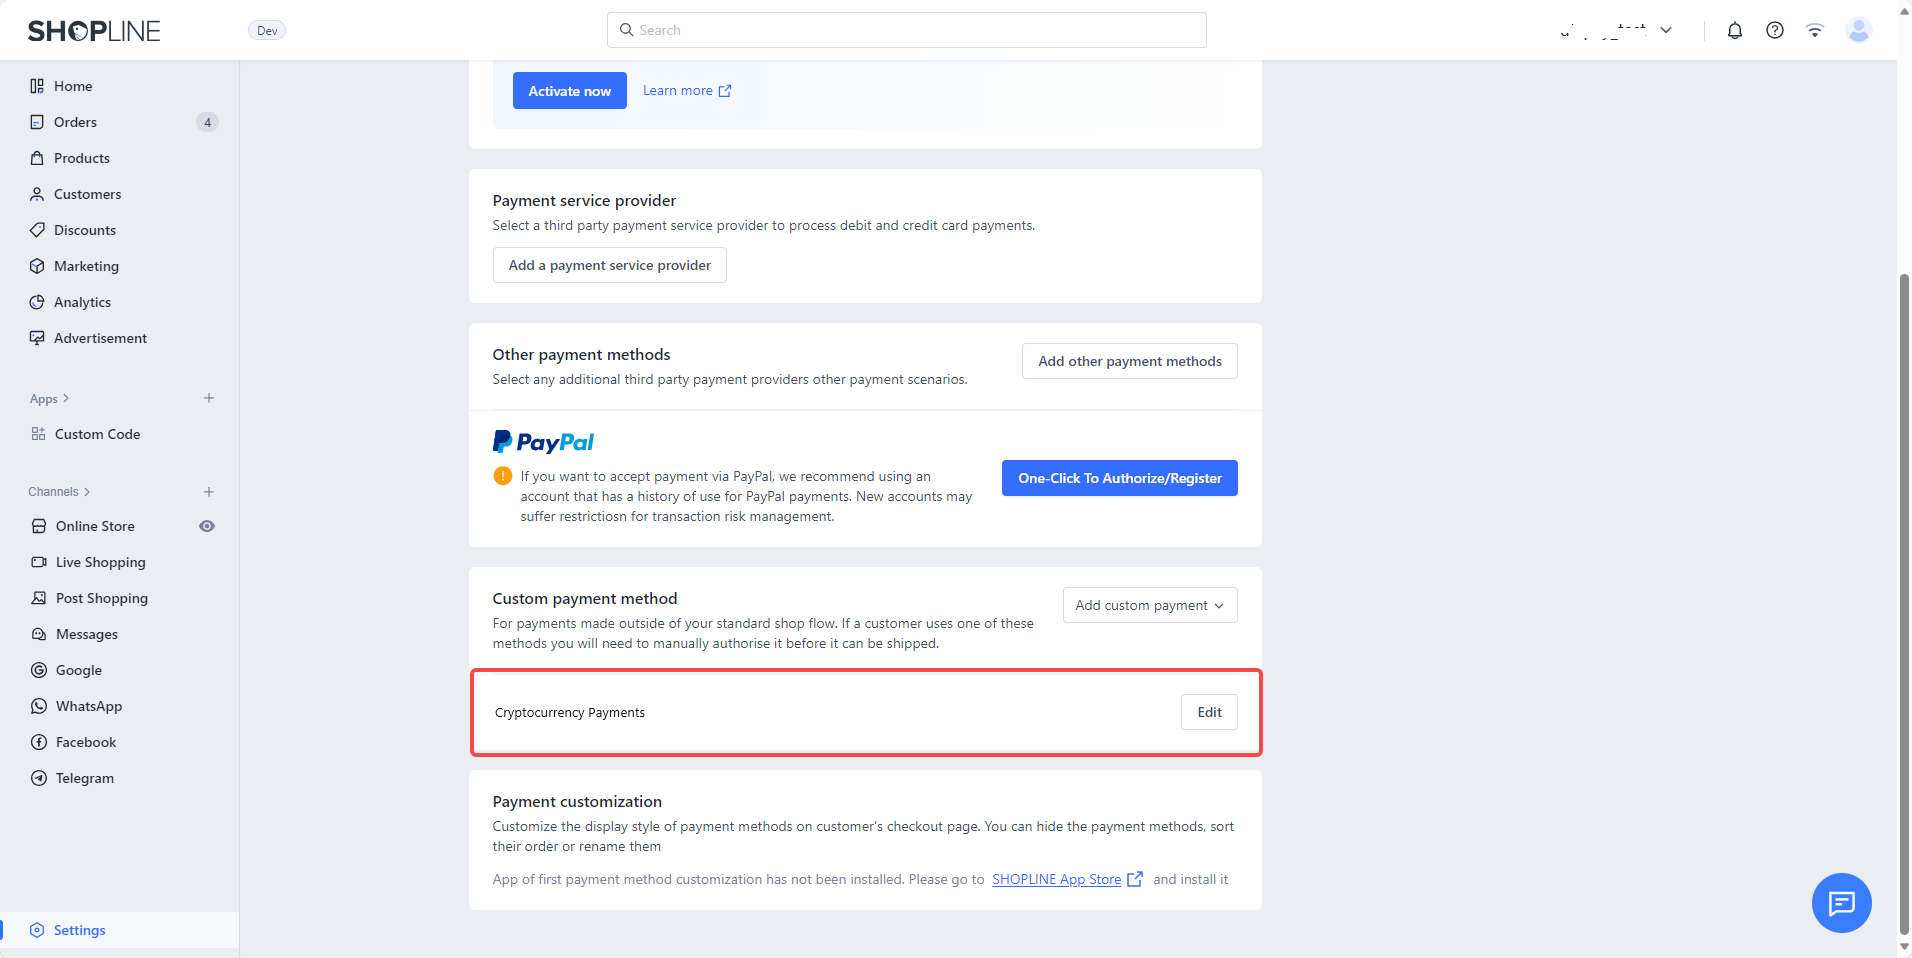
- Now you can see the Pay Protocol payment method in the Custom payment method section.
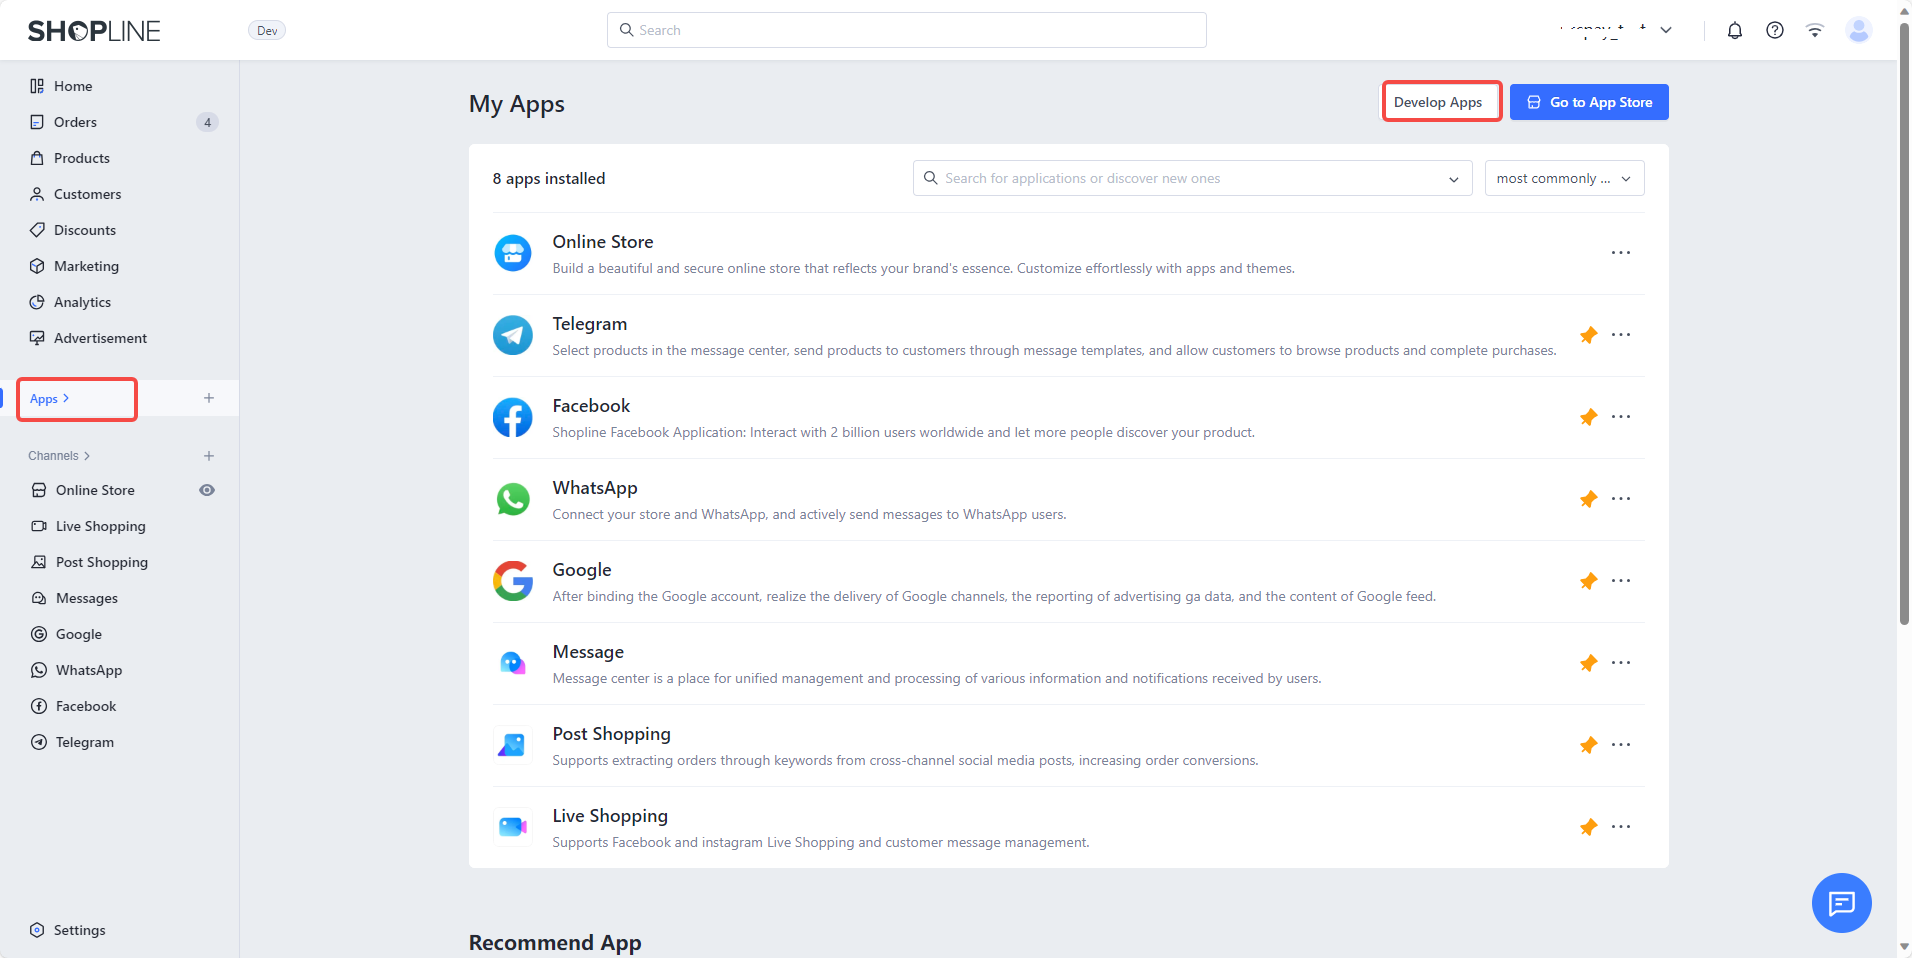
2. Create a private app
The purpose of this step is to synchronize and update the payment status of orders in your Shopline store.
- Go to Apps in your shopline menu, click Develop apps.
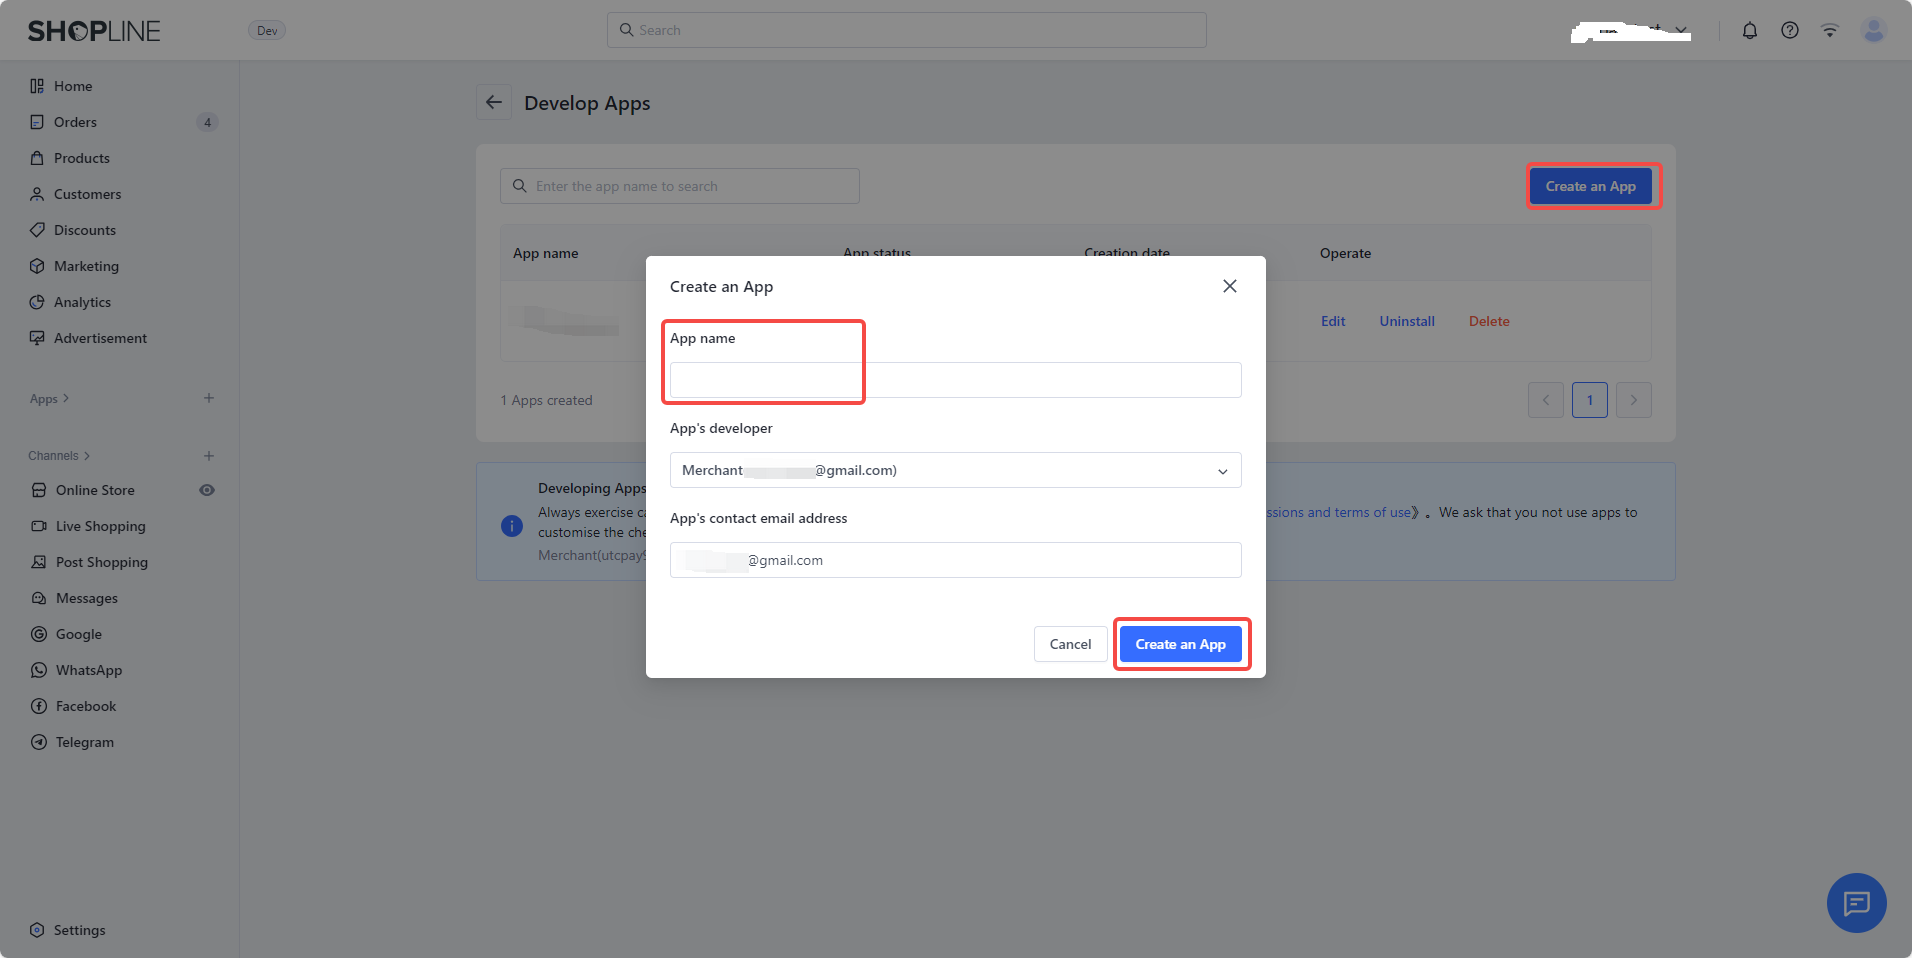
- Click Create an App, enter Pay Protocol Payment Gateway in the App name field, choose yourself as App's developer, then click Create an App.
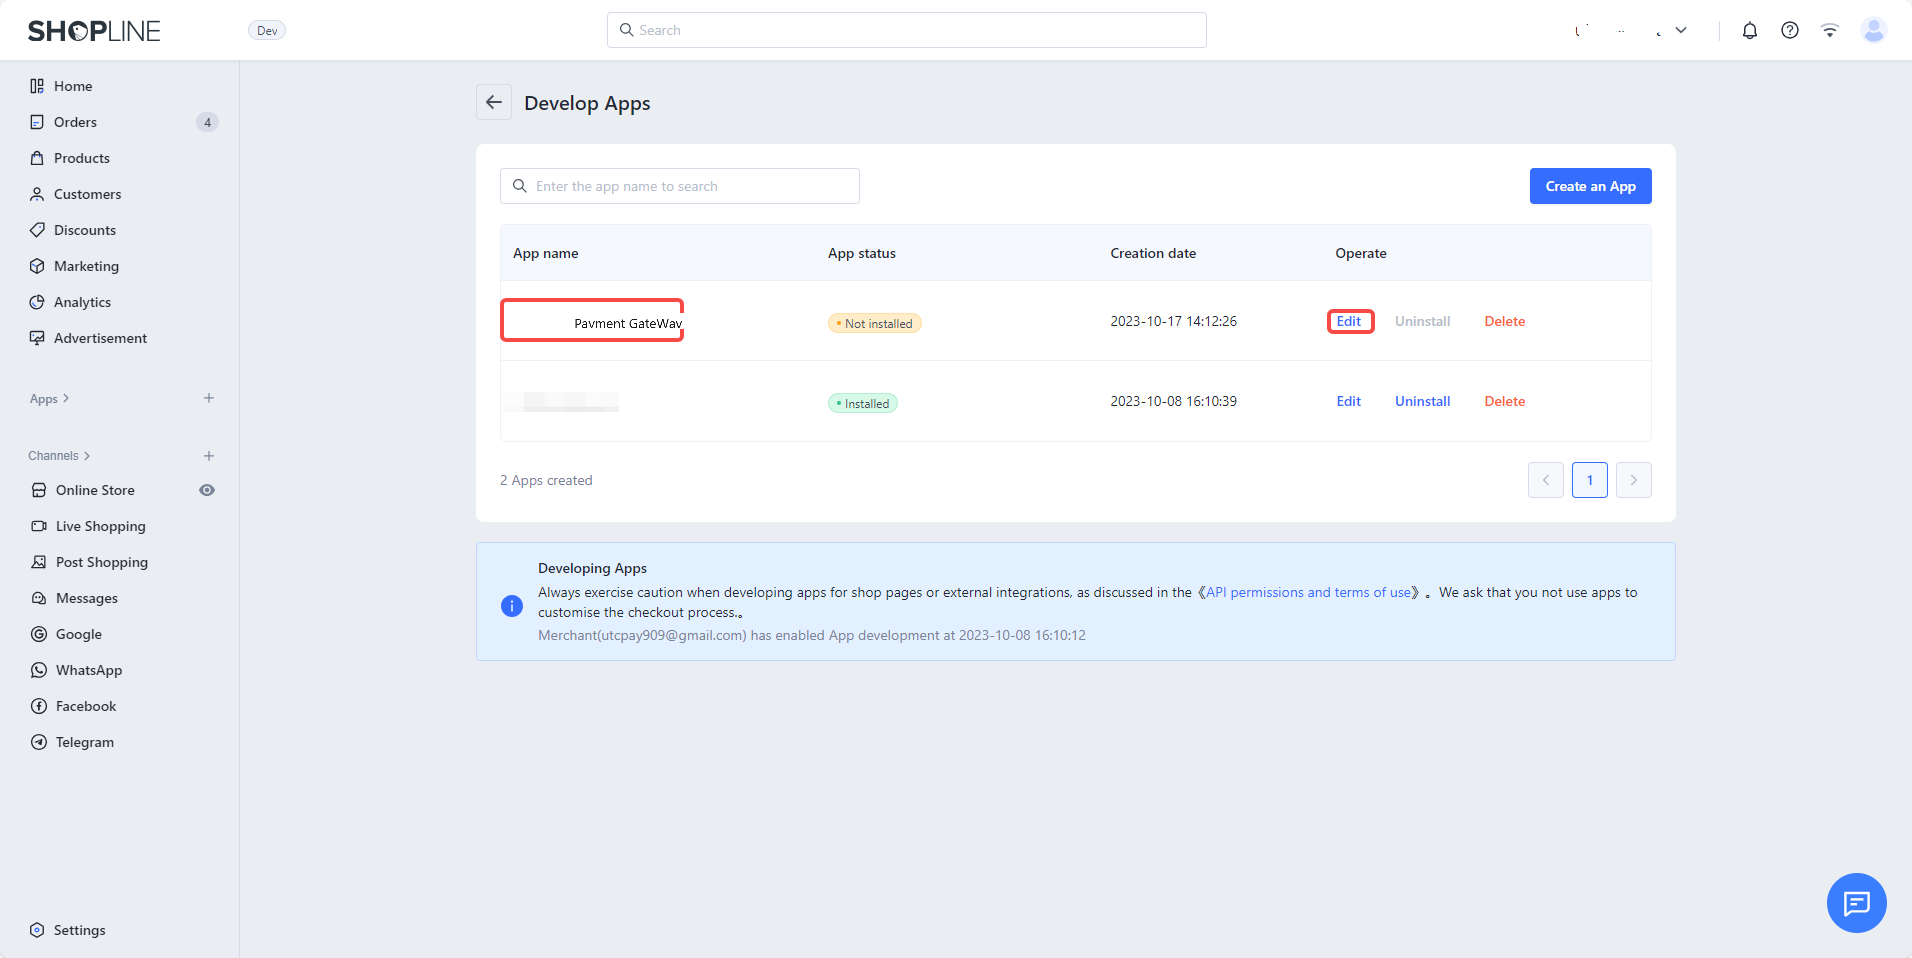
- After the app is created, it will be shown as Not installed in the Develop apps page. Click Edit.
- In the Permission configuration tab, click Configuration in the Integrate Admin API section.
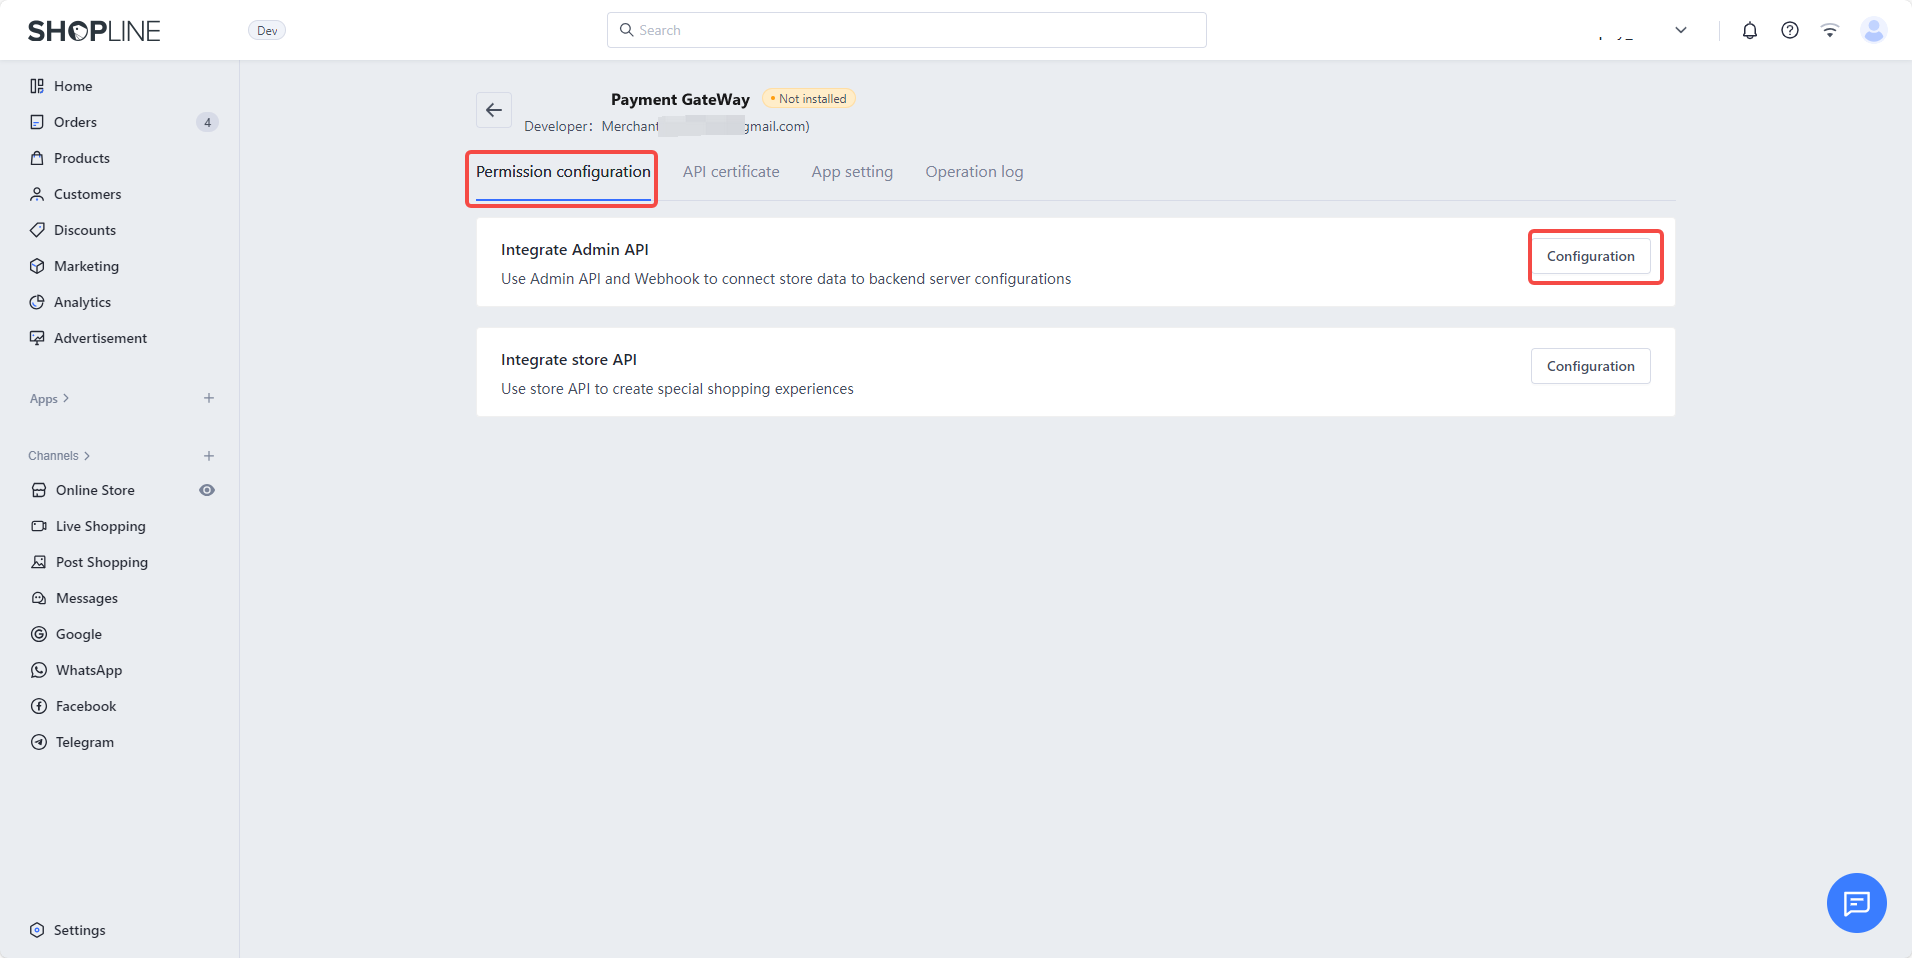
- Search and select the following permissions, then click Save.
Write Orders, Read Orders, Read Store Information
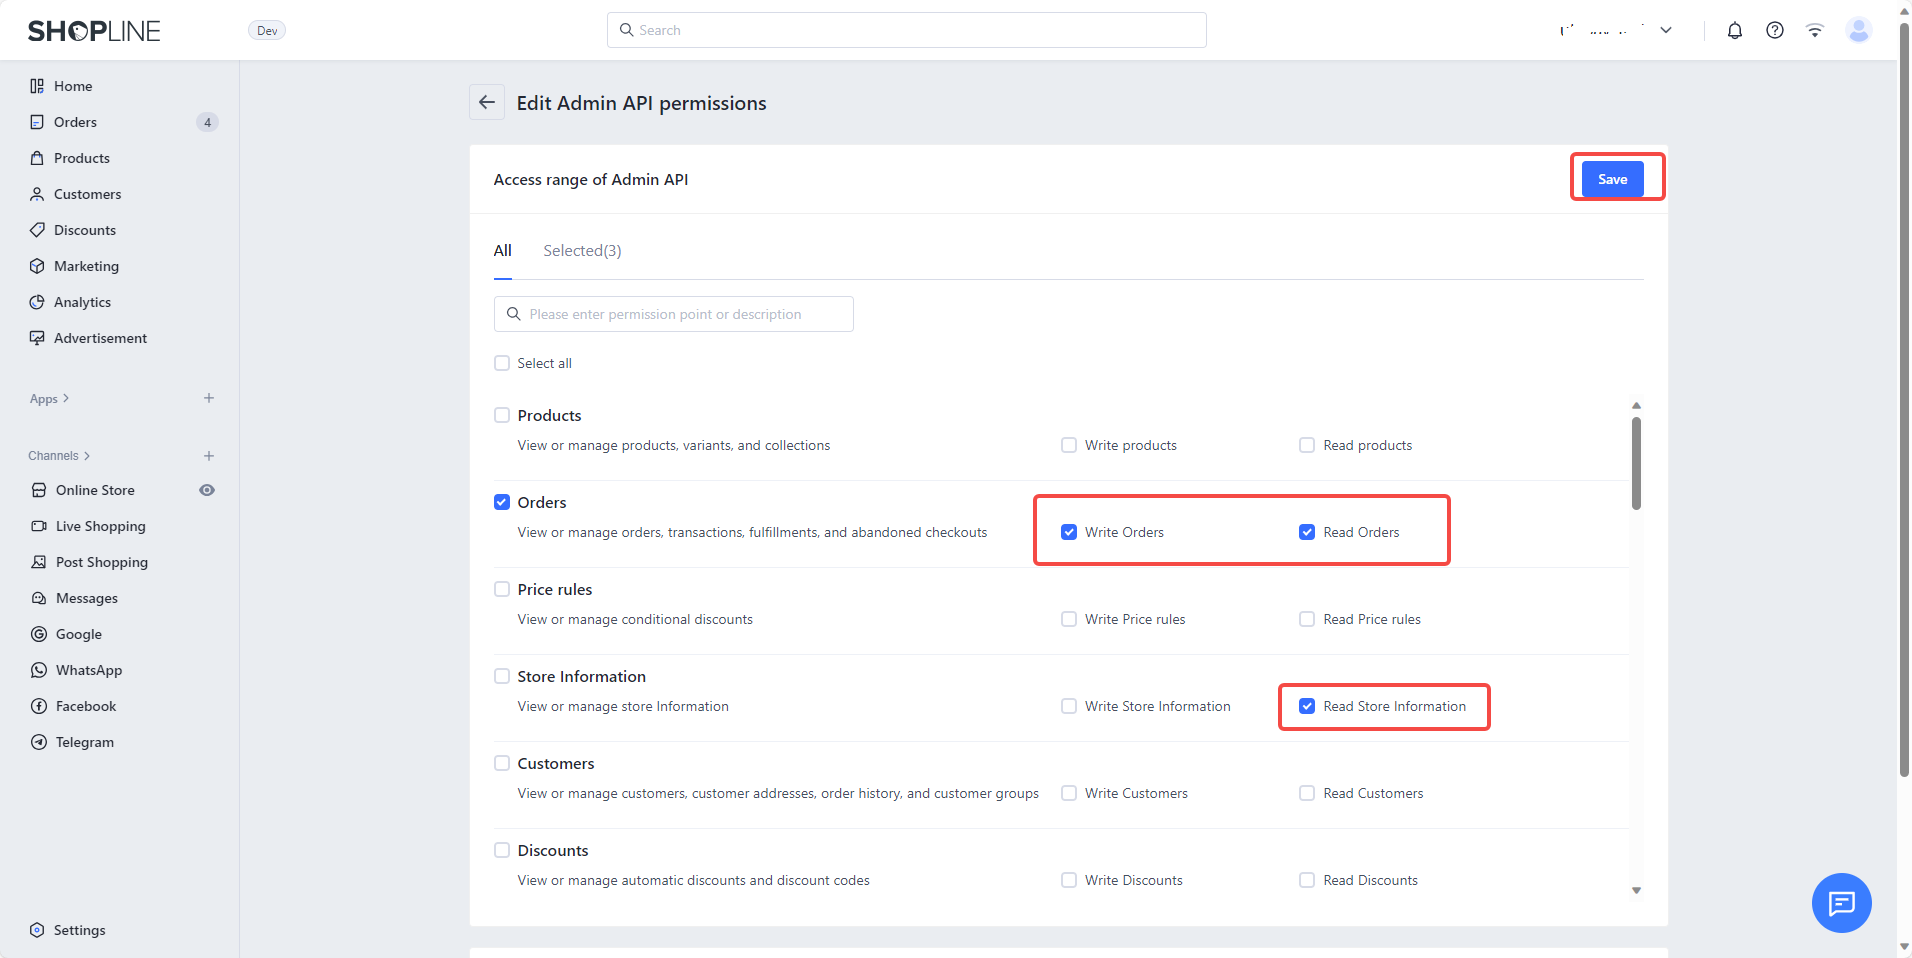
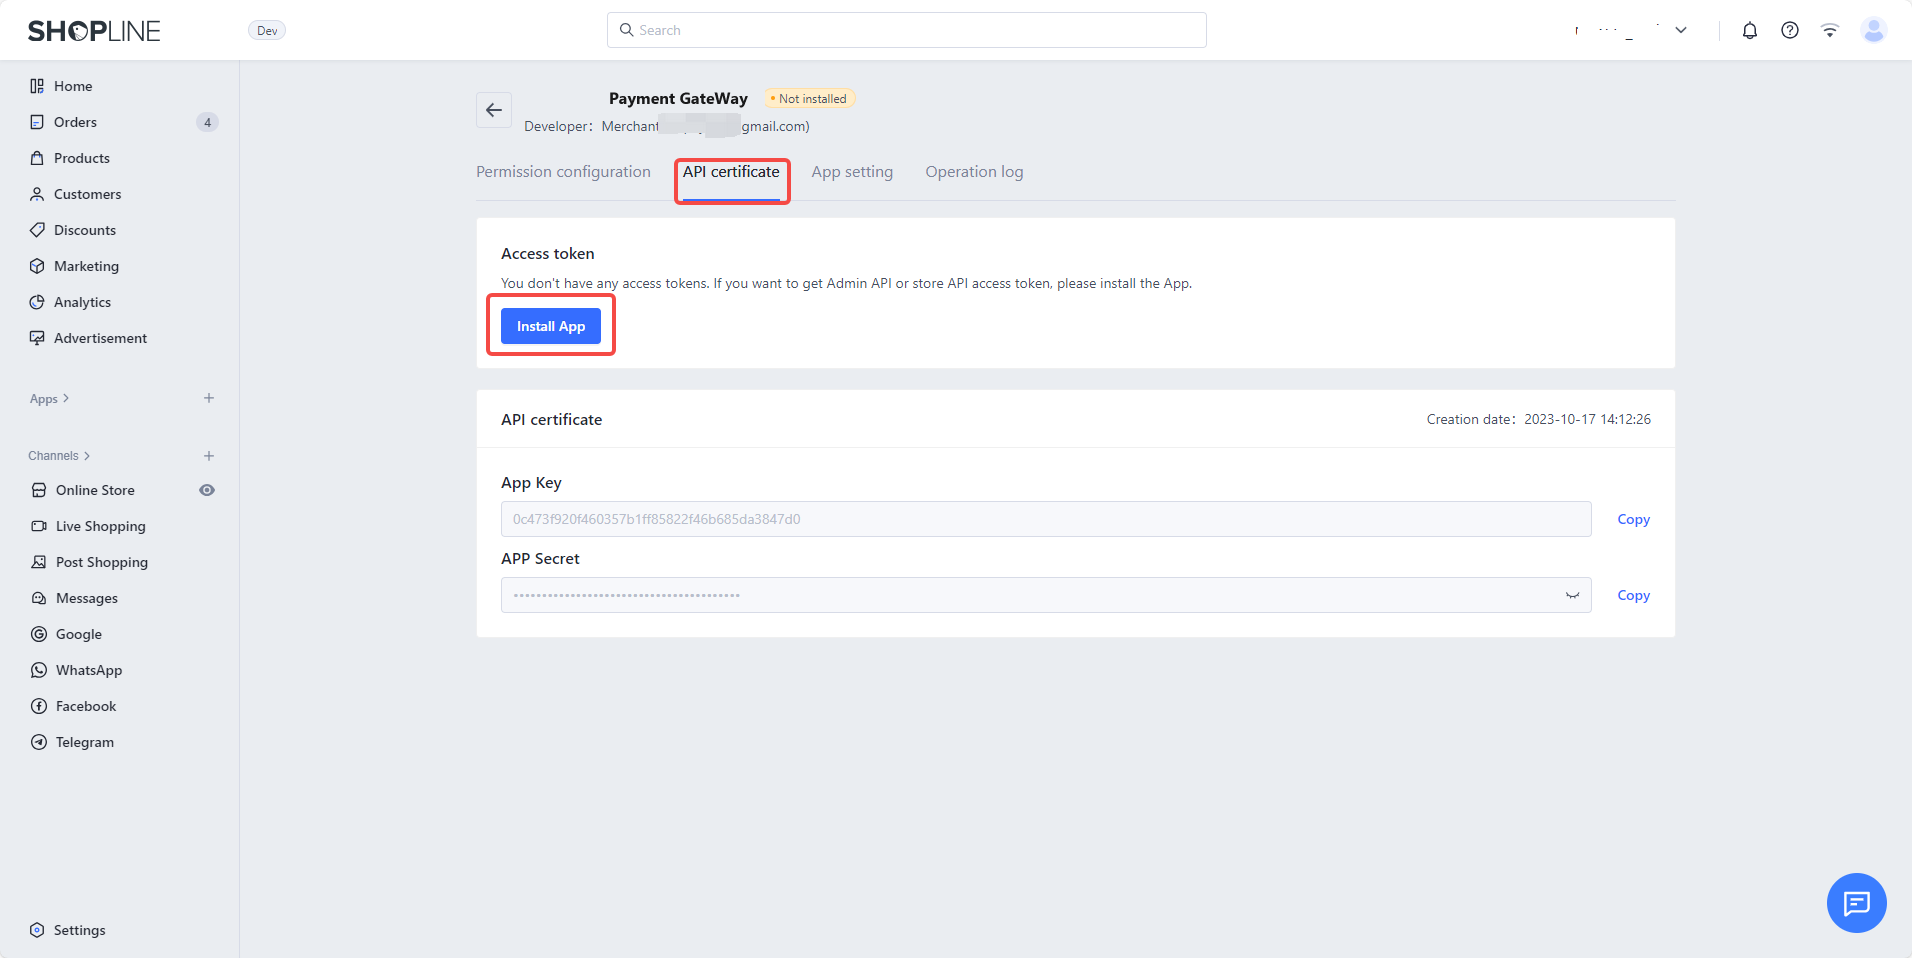
- Select API certificate tab, click Install app.
- After the app is installed, the following page will be displayed. Reveal the Admin API access token and save it for later use.
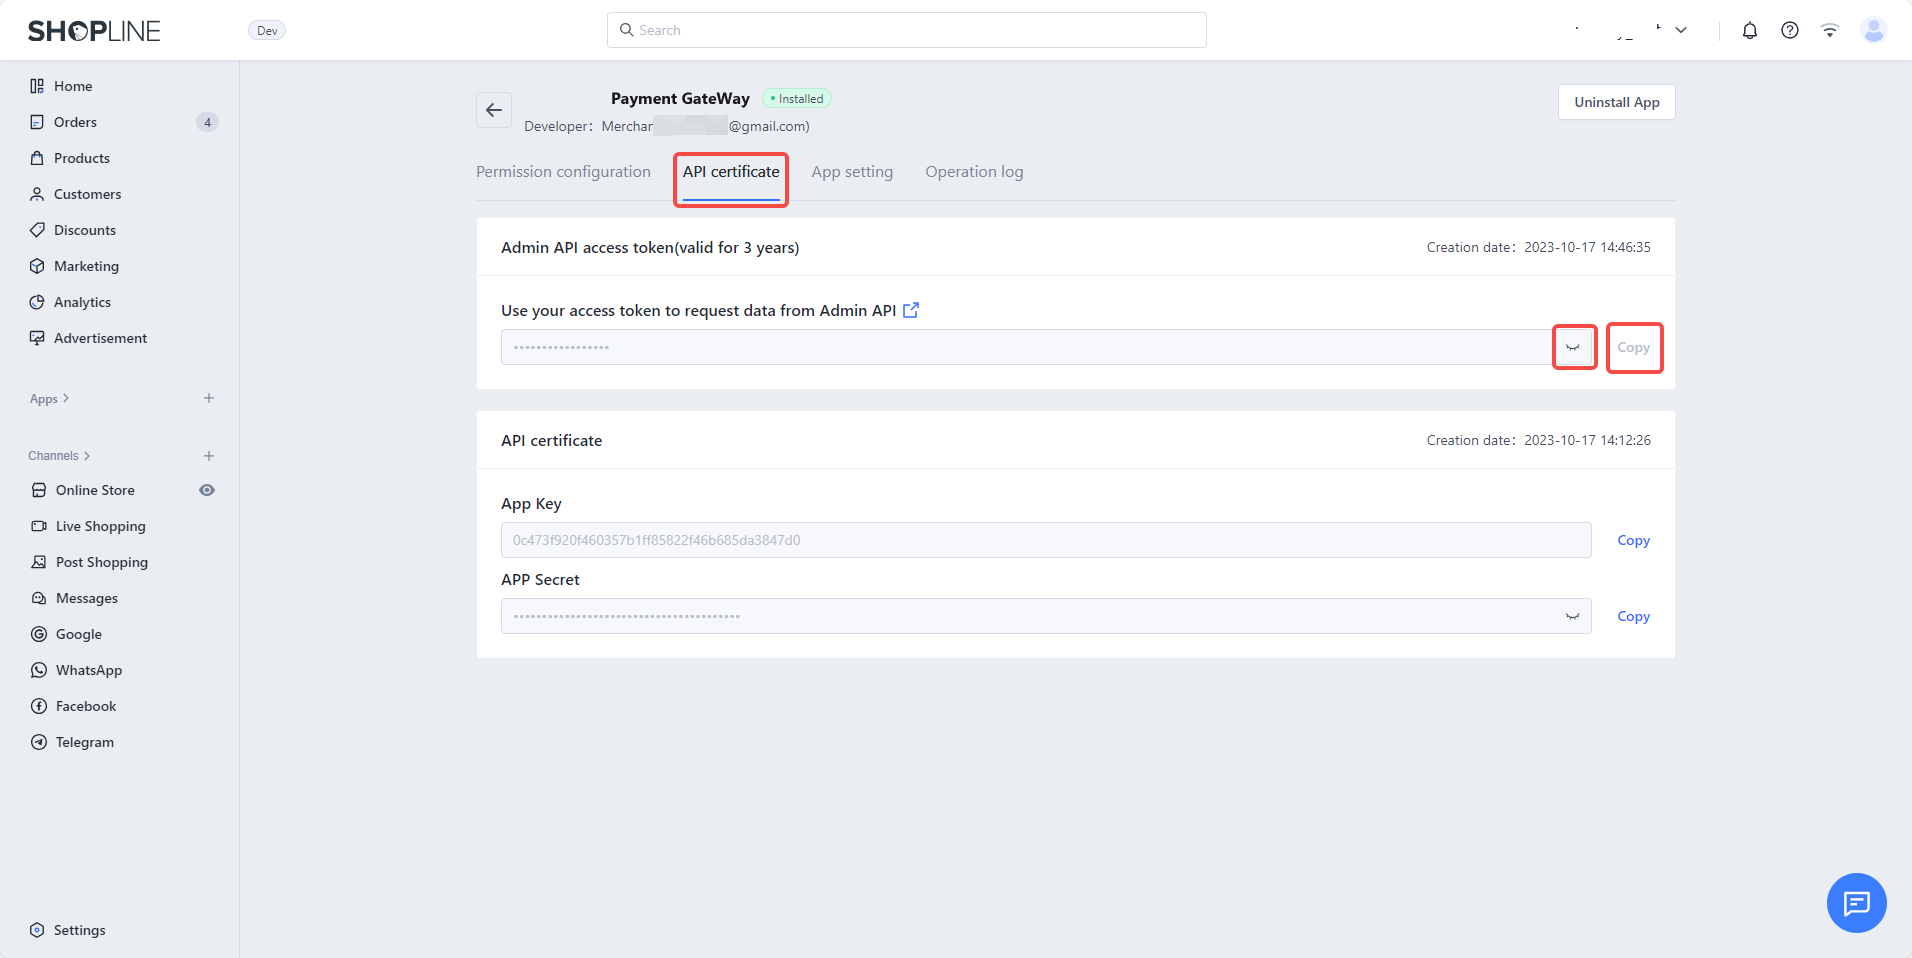
To protect your data, you'll need to verify your email address before you can view the access token. Your token is valid for 3 years. If it is outdated, you can generate a new one and resend it to Pay Protocol.
- Send your shop's information to bd@payprotocol.network
- Your merchant name in Pay Protocol admin console: Your company name
- Your Shopline store URL: https://your-store.myshopline.com
- Your Shopline Admin API access token: the token you saved in step 7
- Your Shopline store quote currency: USD, JPY, HKD, etc.
3. Add the Pay Protocol Shopline plugin
This step aims to call up the Pay Protocol Shopline plugin on the order status page to complete the payment. This plugin only supports the English order status page.
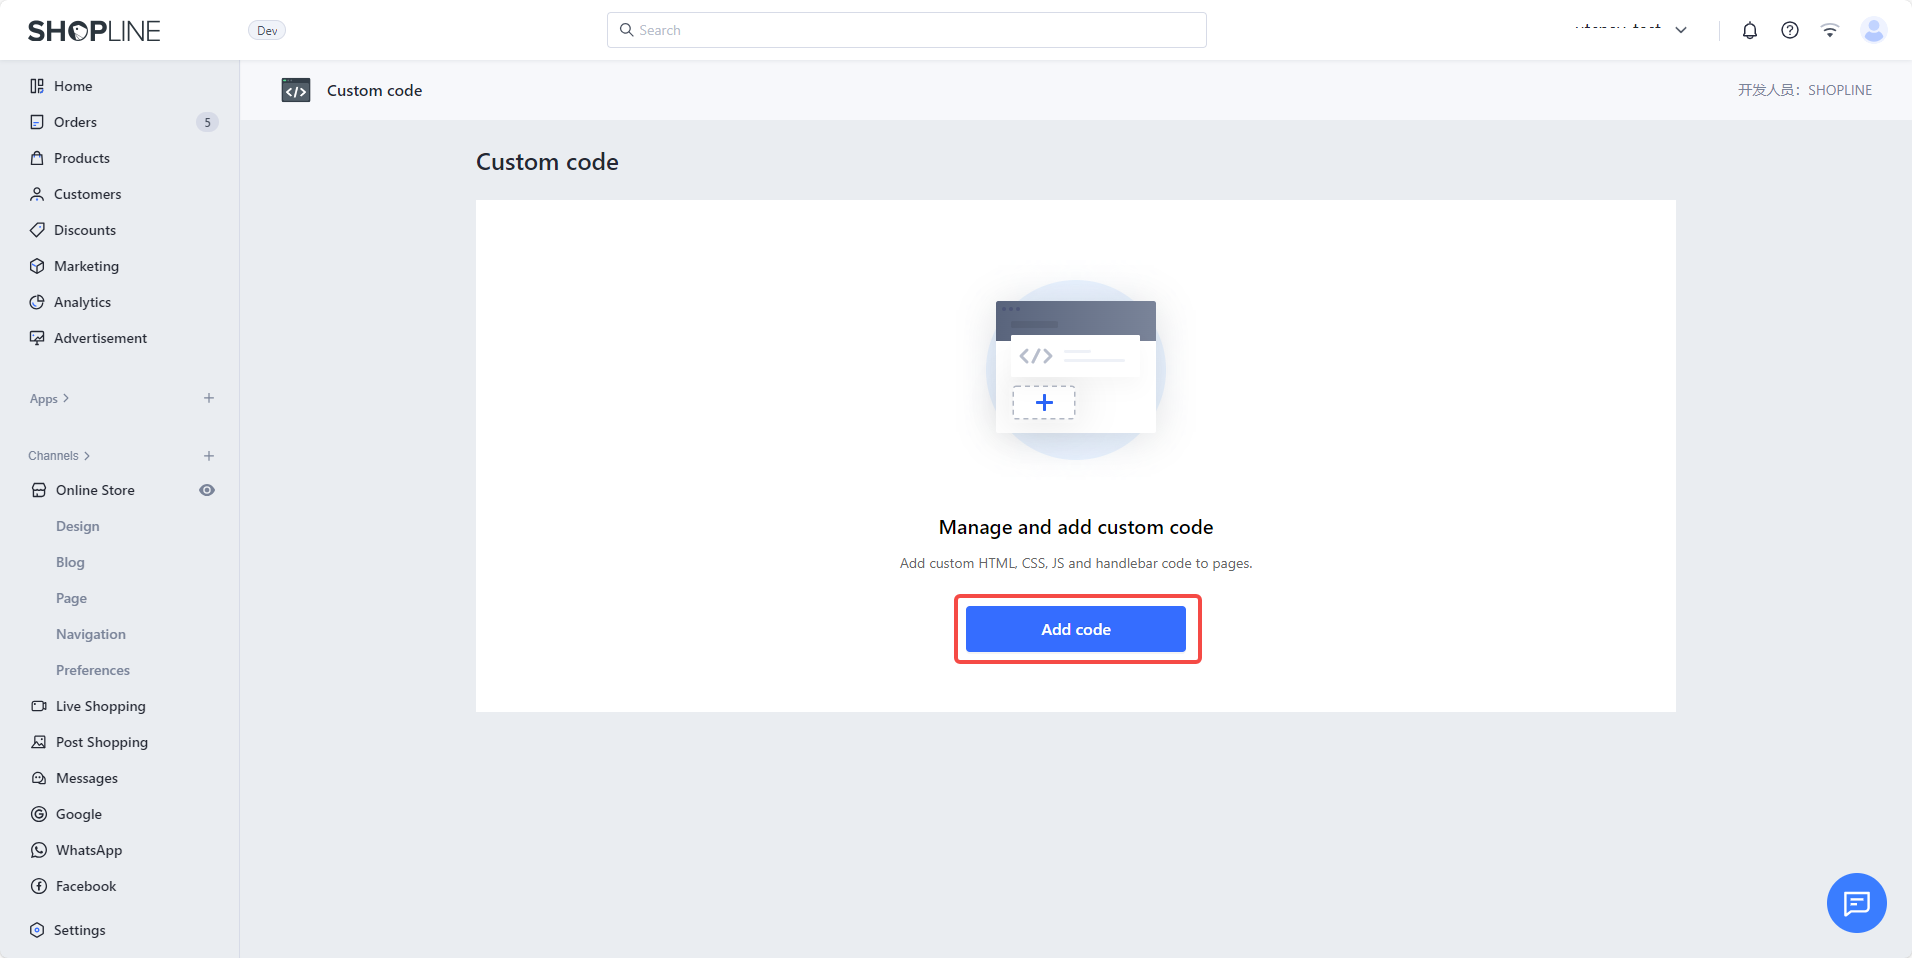
- Got to Shopline App Store, install the Custom Code app.
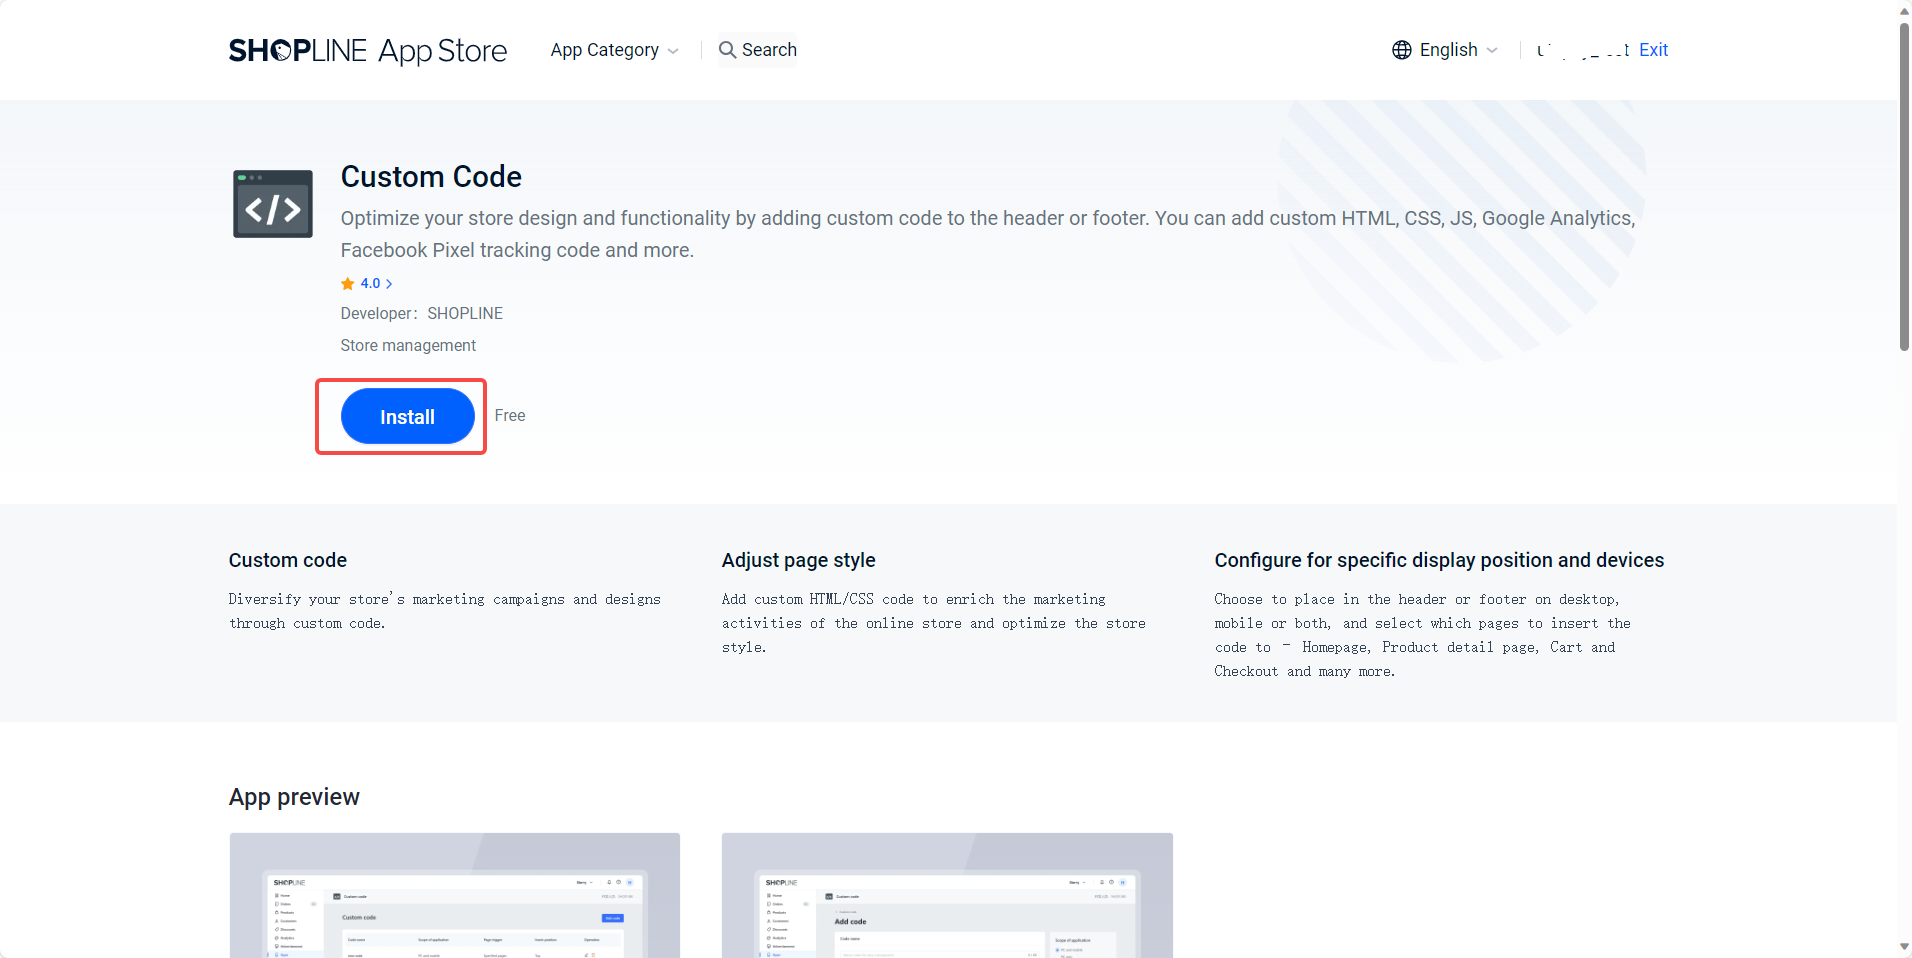
- After installation, you will be redirected to the Custom Code app page. Click Add code.
You can alse go to Apps in your shopline menu, click Custom Code.
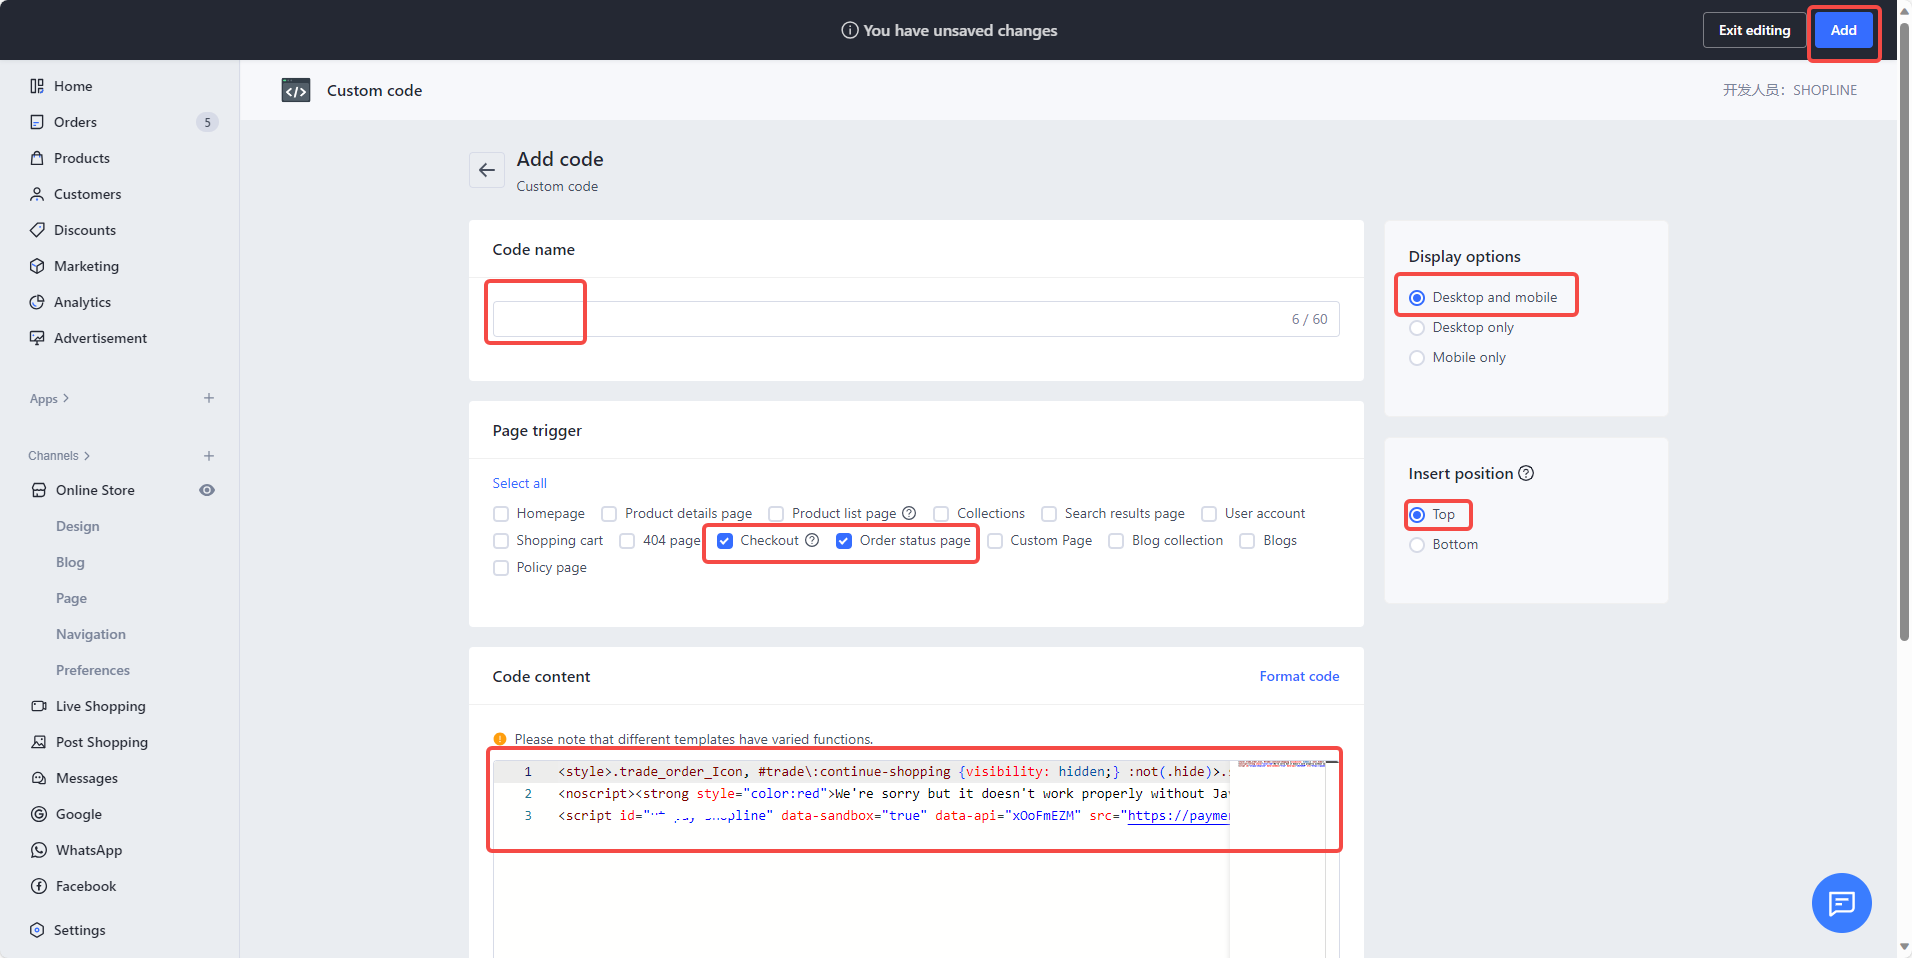
- Enter Pay Protocol in Code name field, select Checkout and Order status page in Page trigger, and copy the following code and paste it into Code content field.
<style>.trade_order_Icon, #trade\:continue-shopping {visibility: hidden;} :not(.hide)>.sub-title {display: none;}</style>
<noscript><strong style="color:red">We're sorry but it doesn't work properly without JavaScript enabled. Please enable it to continue.</strong></noscript>
<script id="payprotocol-shopline" data-sandbox="false" data-api="your-api-key" src="https://plugin.payprotocol.network/shopline.js"></script>
Change your-api-key to your Pay Protocol API key. If you want to test the plugin in Pay Protocol sandbox environment, change data-sandbox="false" to data-sandbox="true".
Click Add on the top right corner of the page.
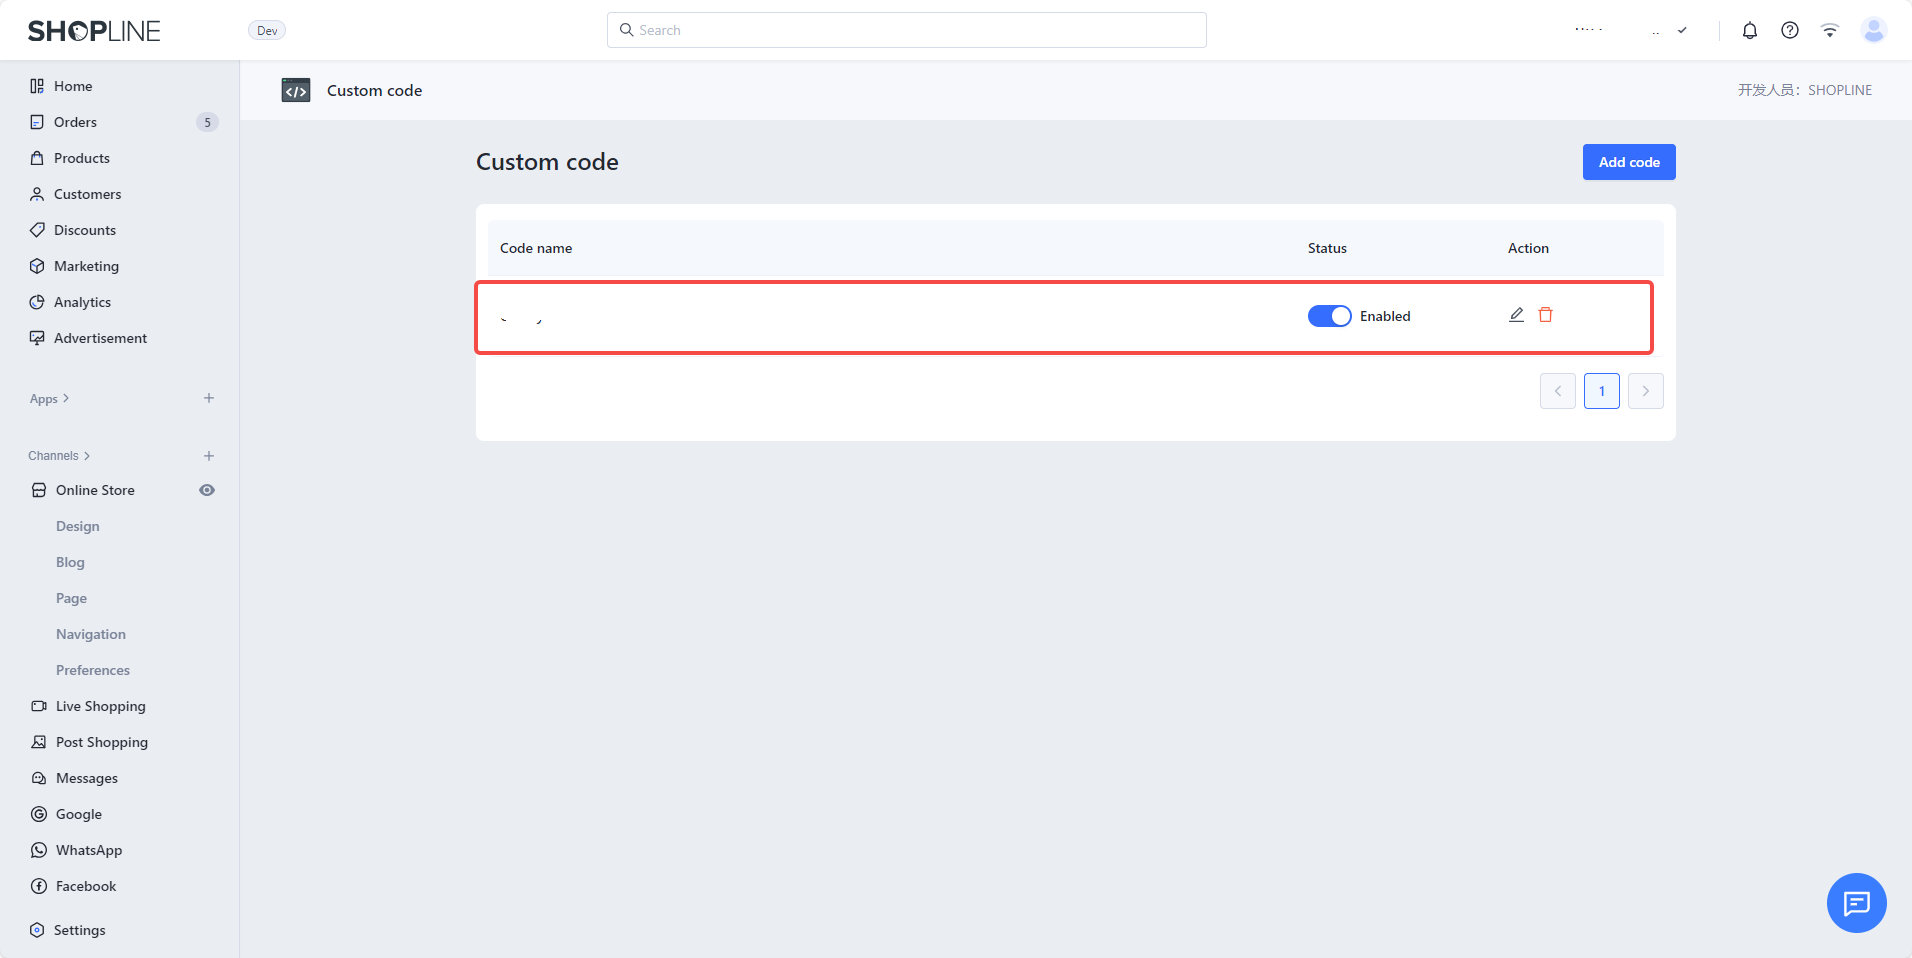
- Make sure the Pay Protocol code is Enabled.
After completing the above steps, you successfully deployed the Pay Protocol Shopline plugin. You can now accept cryptocurrency payments in your Shopline store.
How to pay cryptocurrency with Pay Protocol Shopline plugin
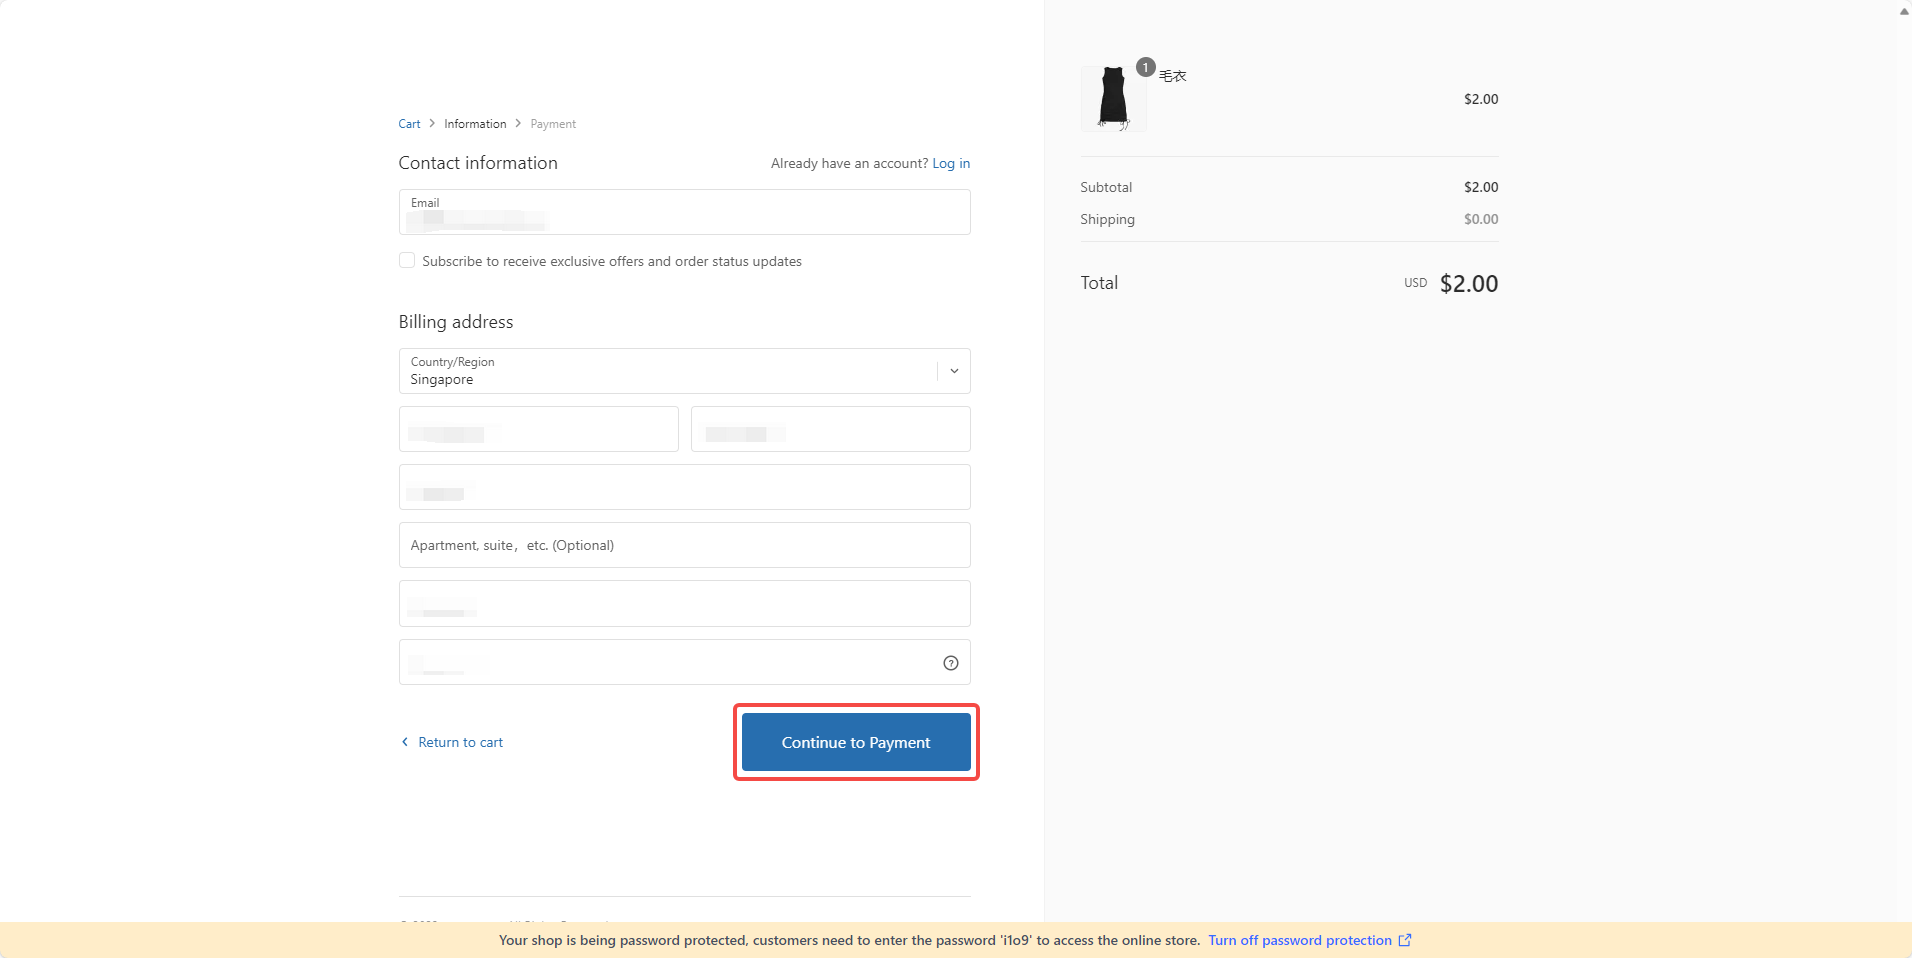
- Add products to your shopping cart and click Checkout.
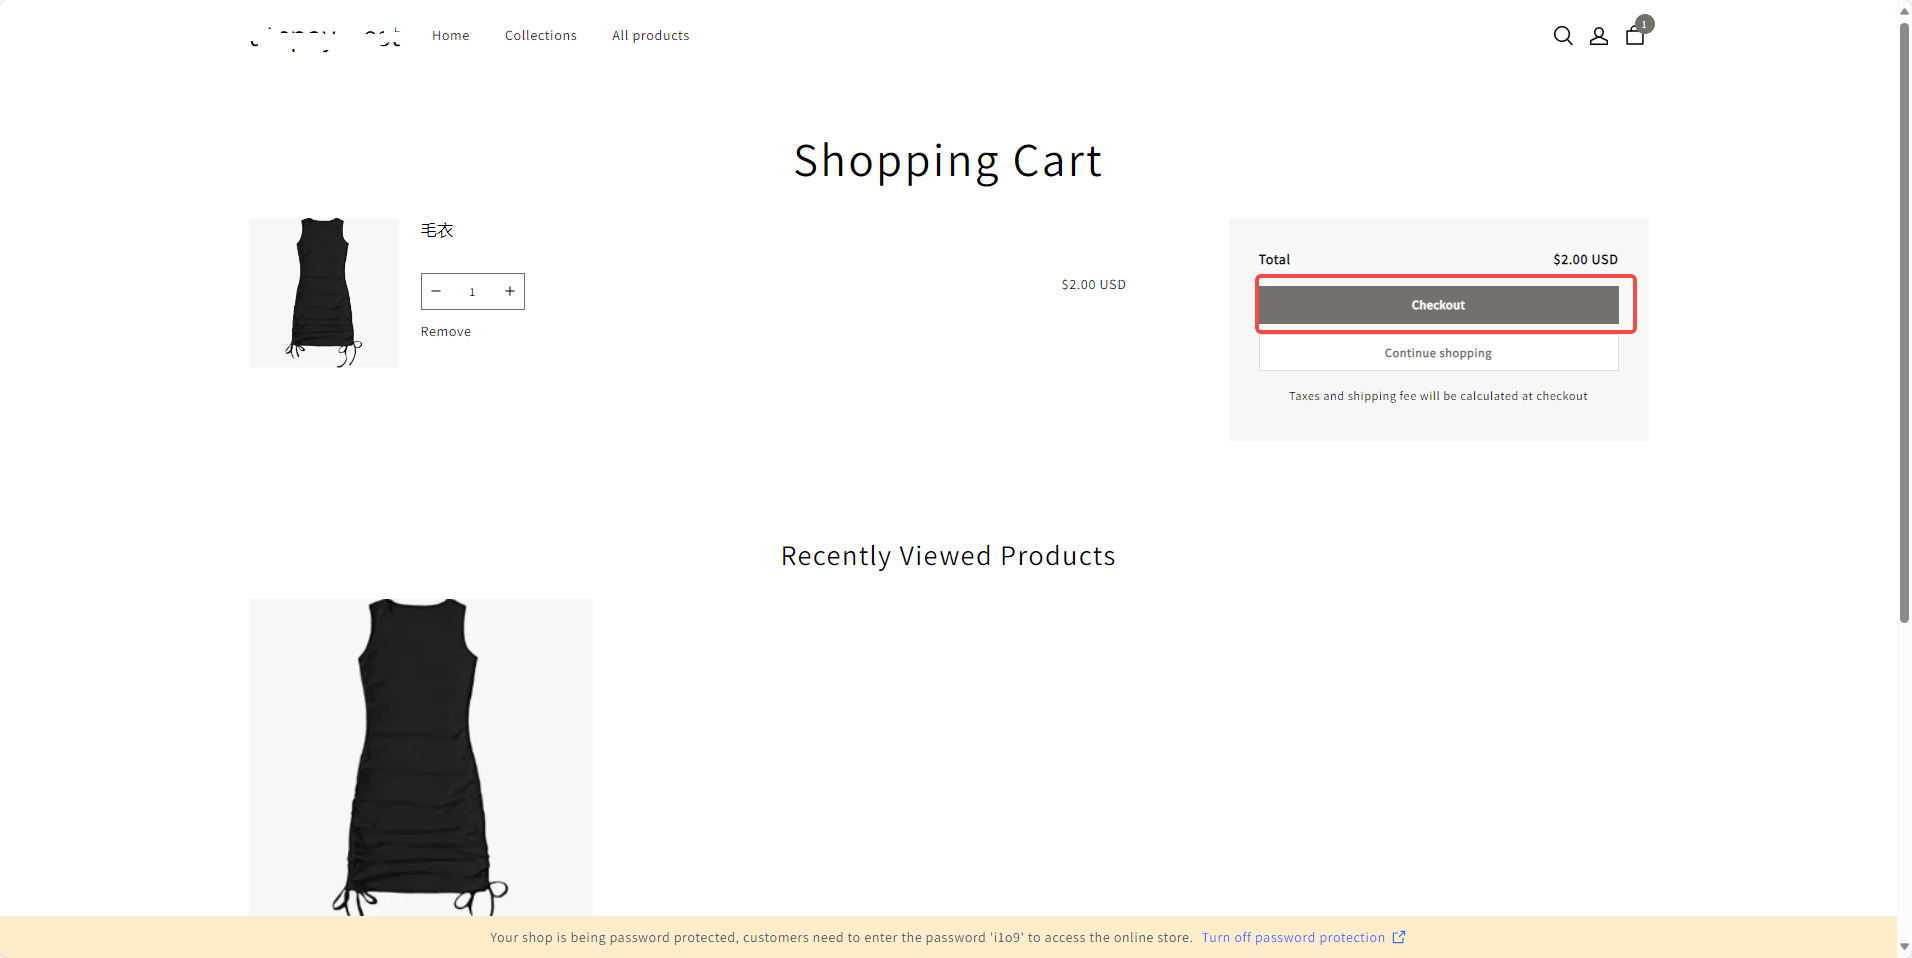
- Confirm your Contact information and Billing address, click Continue to Payment.
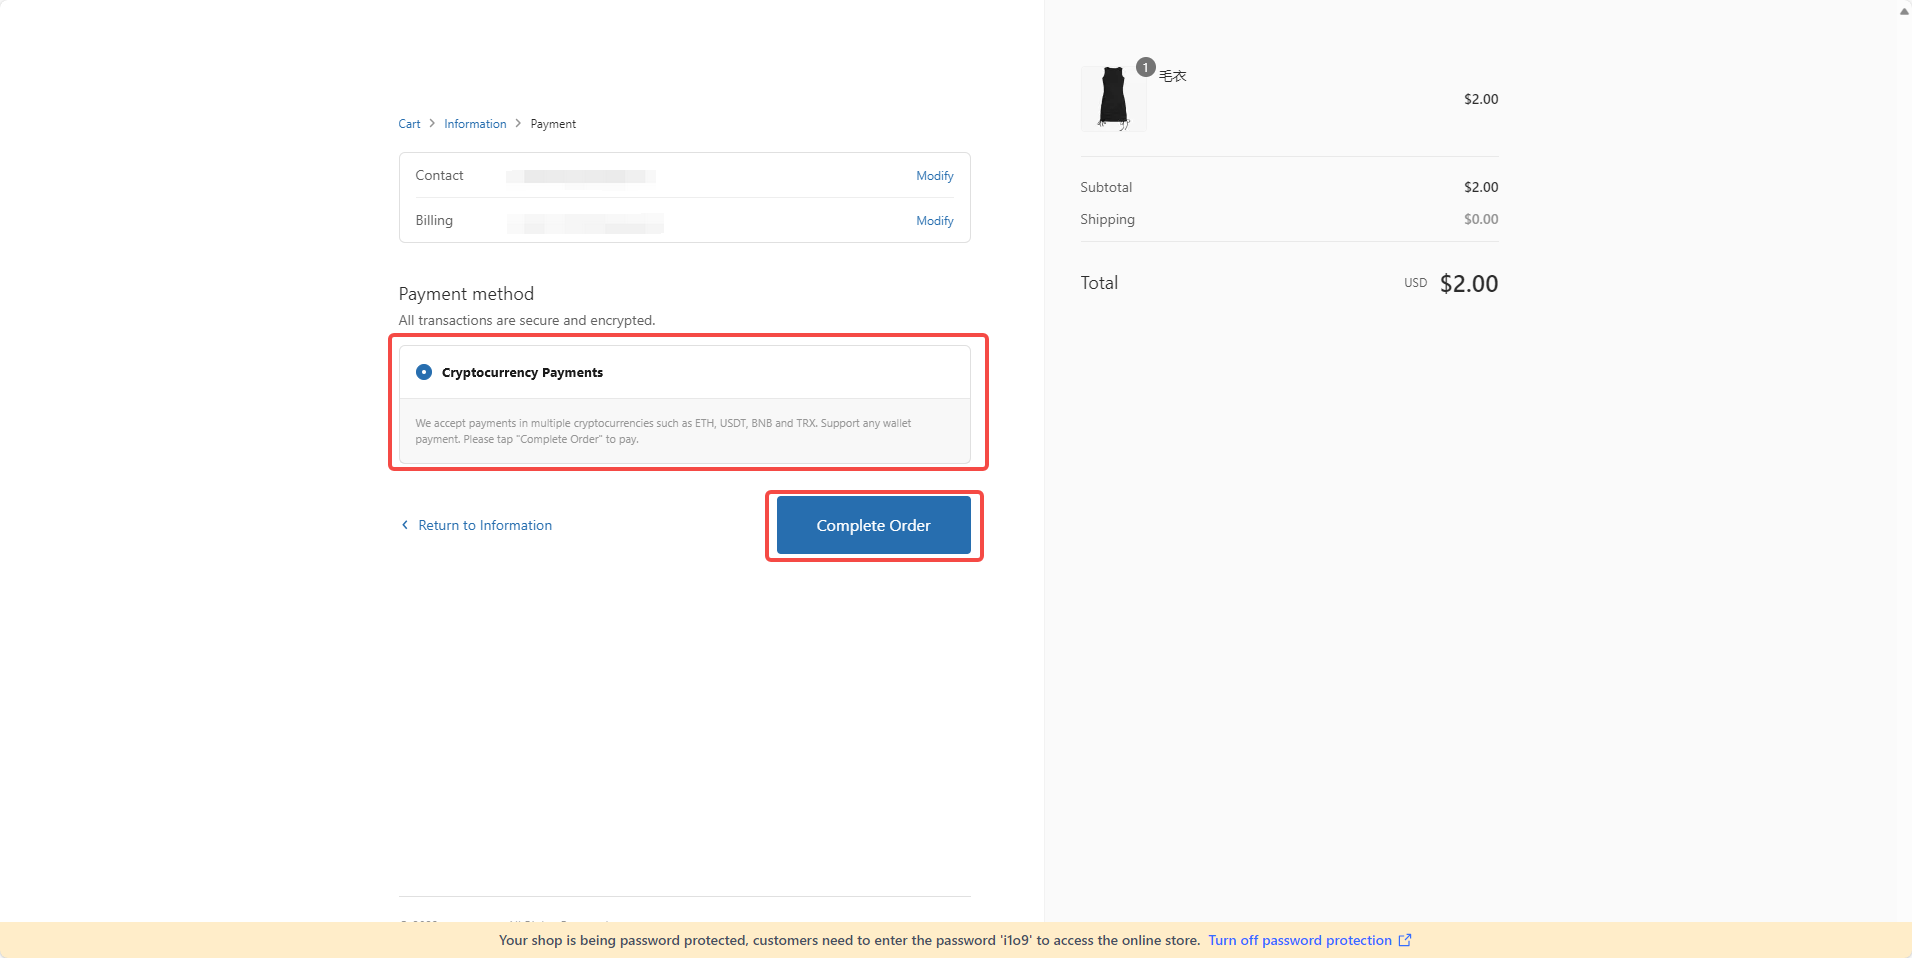
- Choose Pay Protocol as your payment method, click Complete Order.
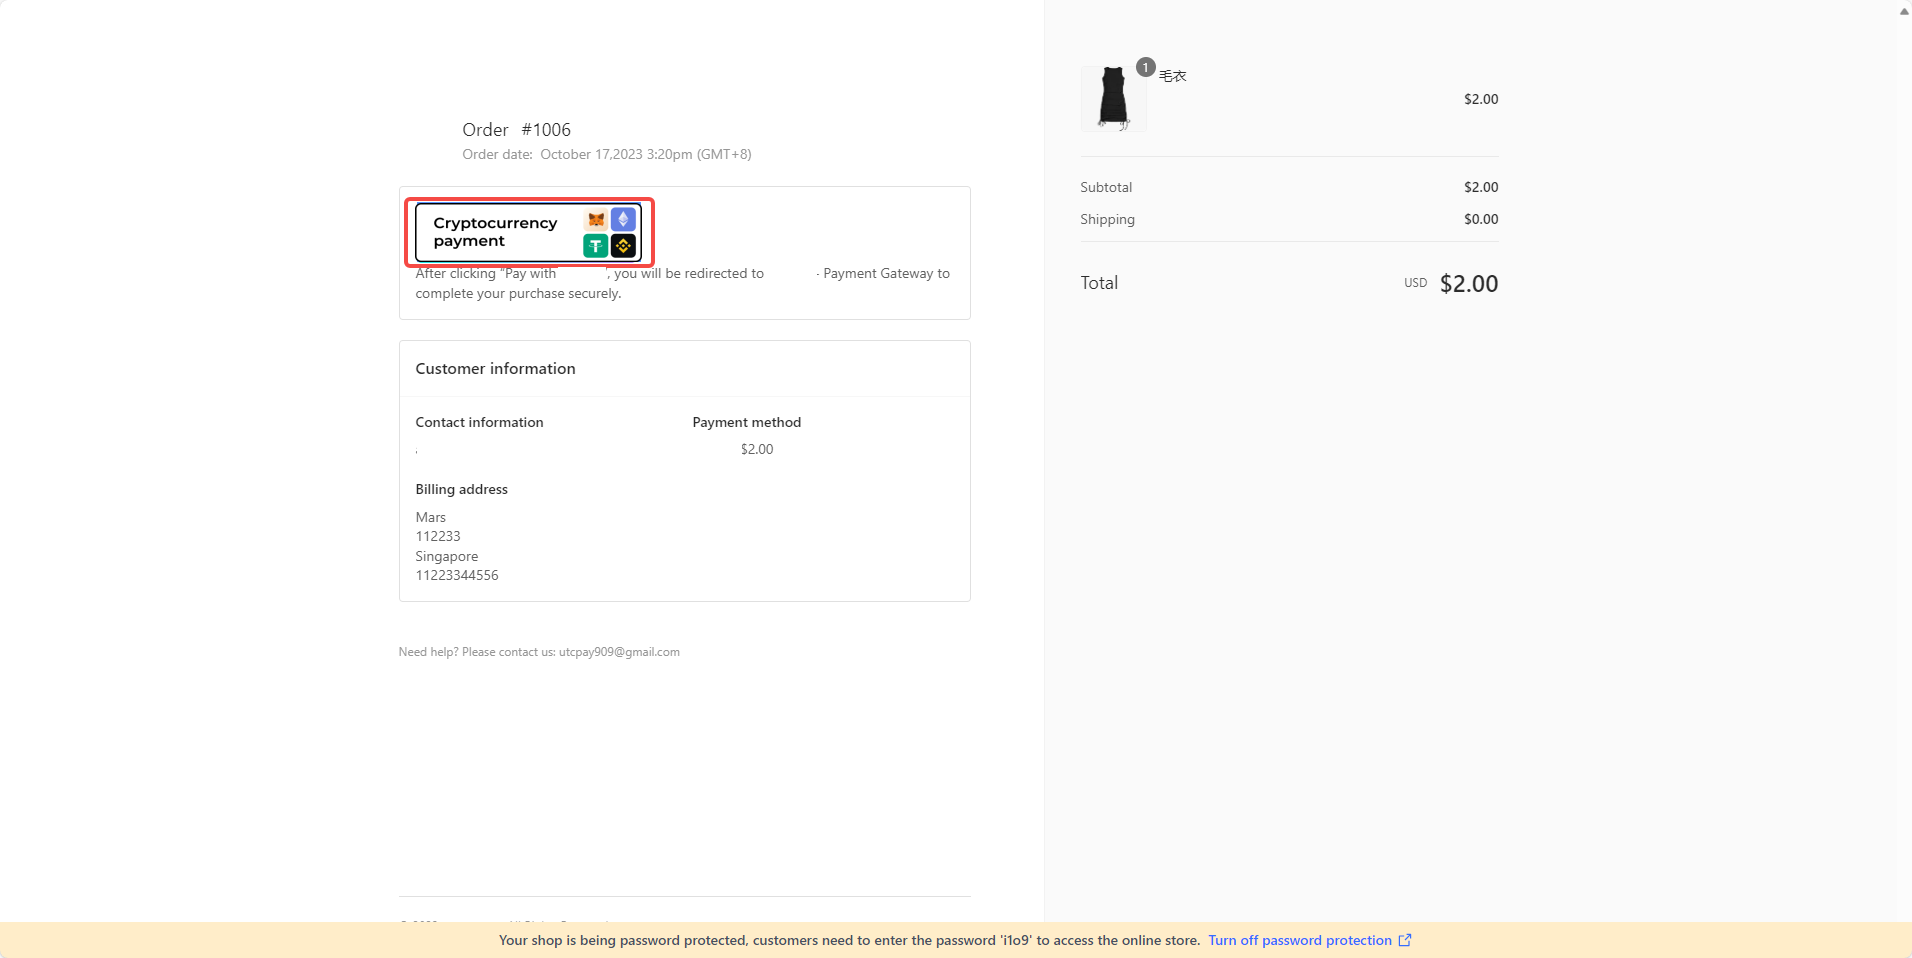
- Now you will be redirected to order confirmation page, click Cryptocurrency Payment.
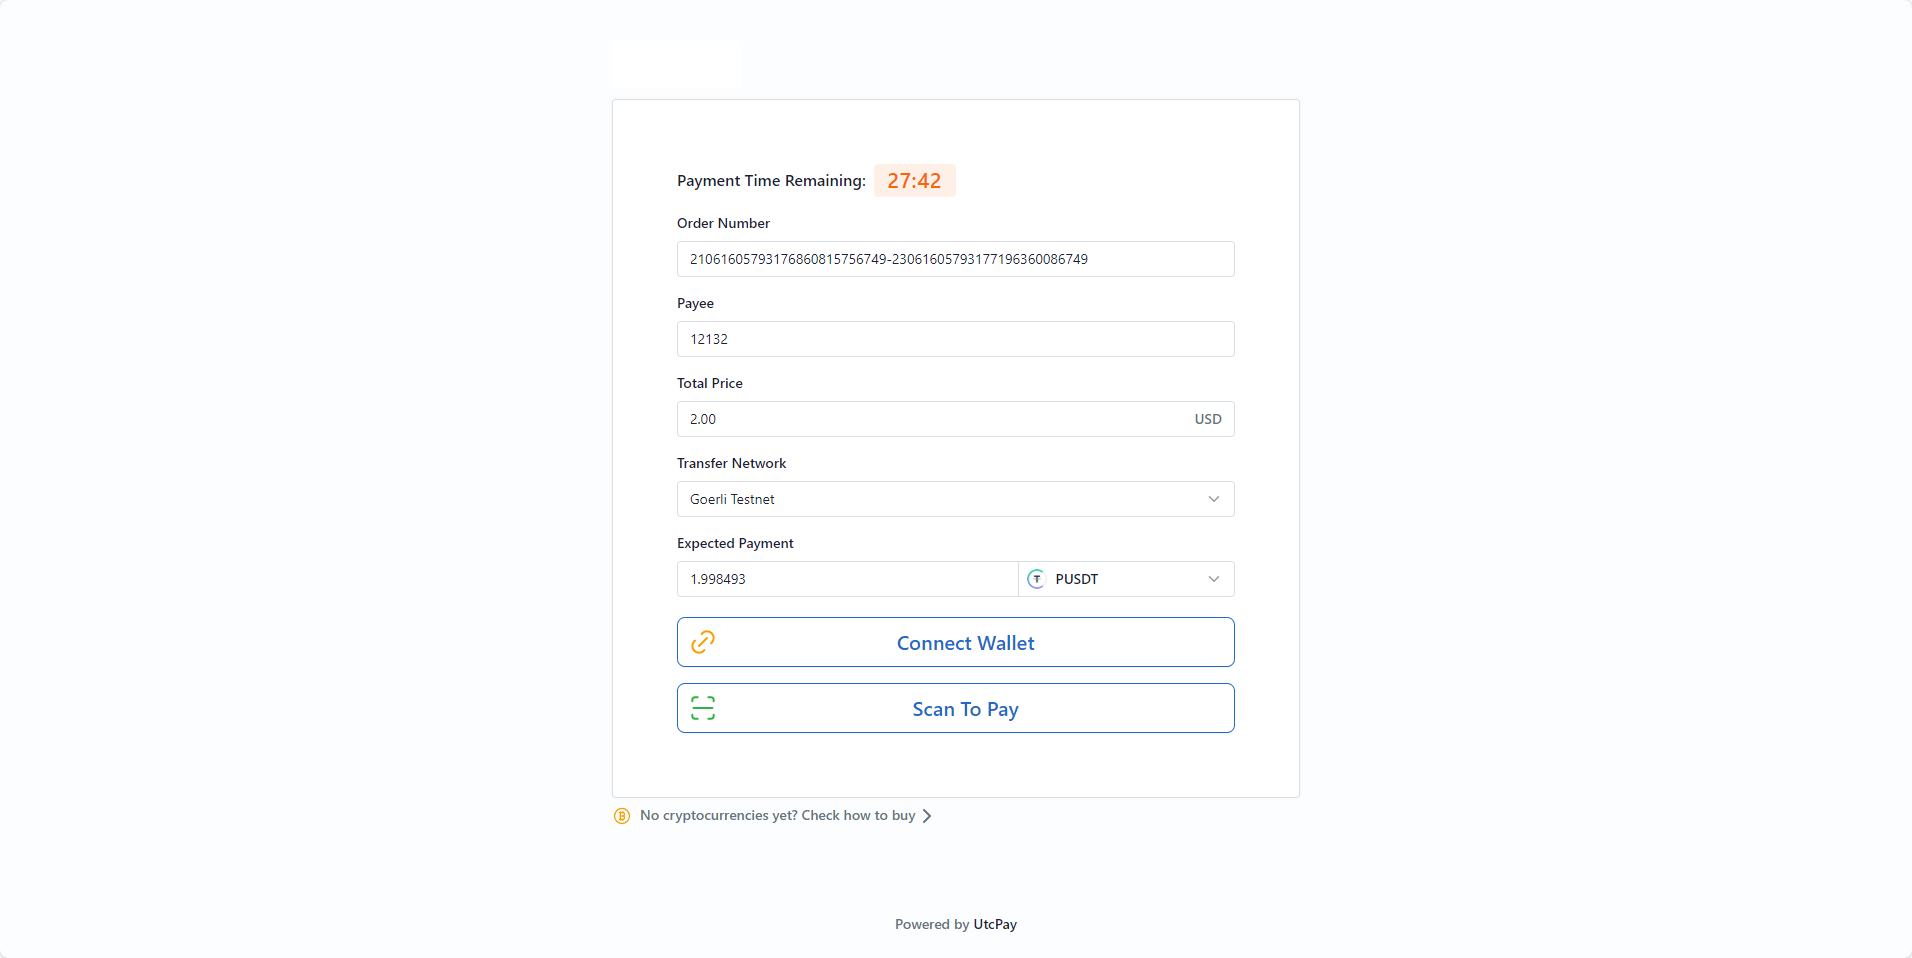
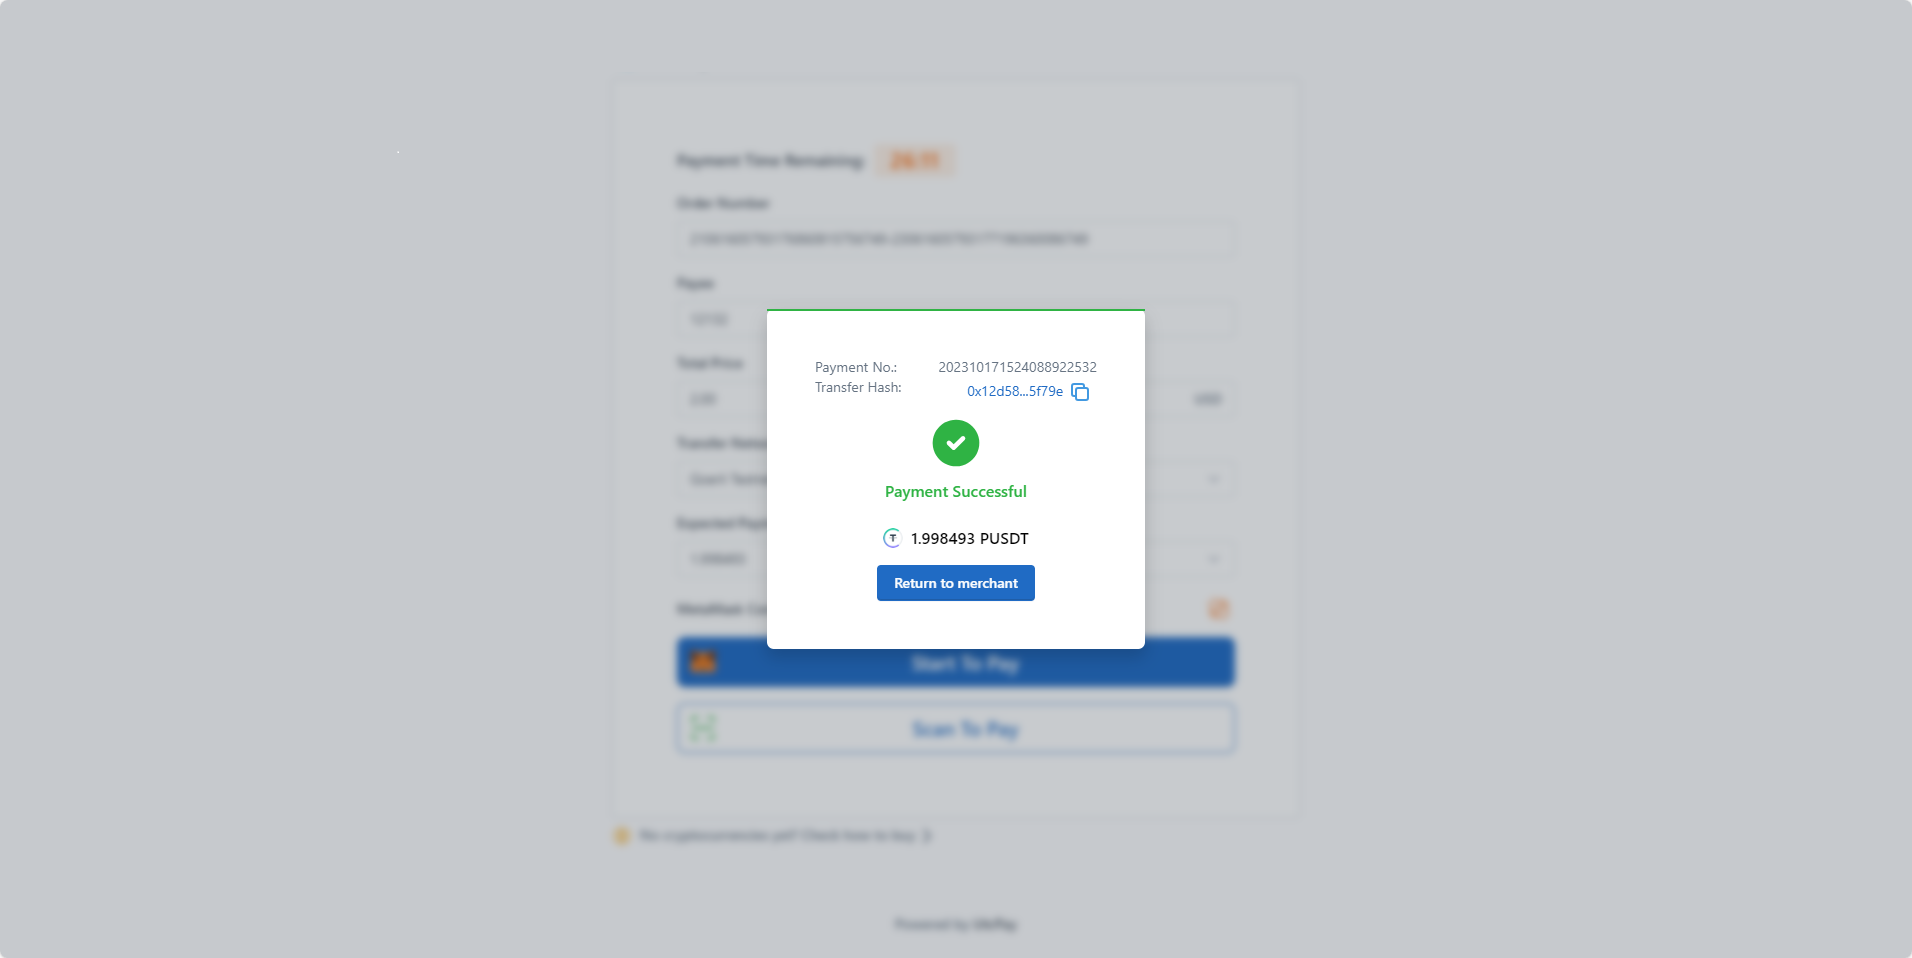
- After clicking Cryptocurrency Payment, you will be redirected to Pay Protocol payment page. Select the network and cryptocurrency you want to pay with, and click Scan To Pay to start the payment.
- After successful payment, click Return to merchant to return to the order confirmation page.
- Now you can see the order is confirmed and paid.
