Creating a Web3 Wallet
If you already have a Web3 wallet, you can skip this section.
The following steps are based on two popular wallets, TronLink and imToken. The basic operations are similar for other wallets.
TronLink Wallet
Wallet Installation
Using Chrome browser as an example:
- Before installing the TronLink plugin, make sure you have the latest version of Chrome browser installed. If you already have it, you can skip this step.
- Install the TronLink wallet plugin:
-
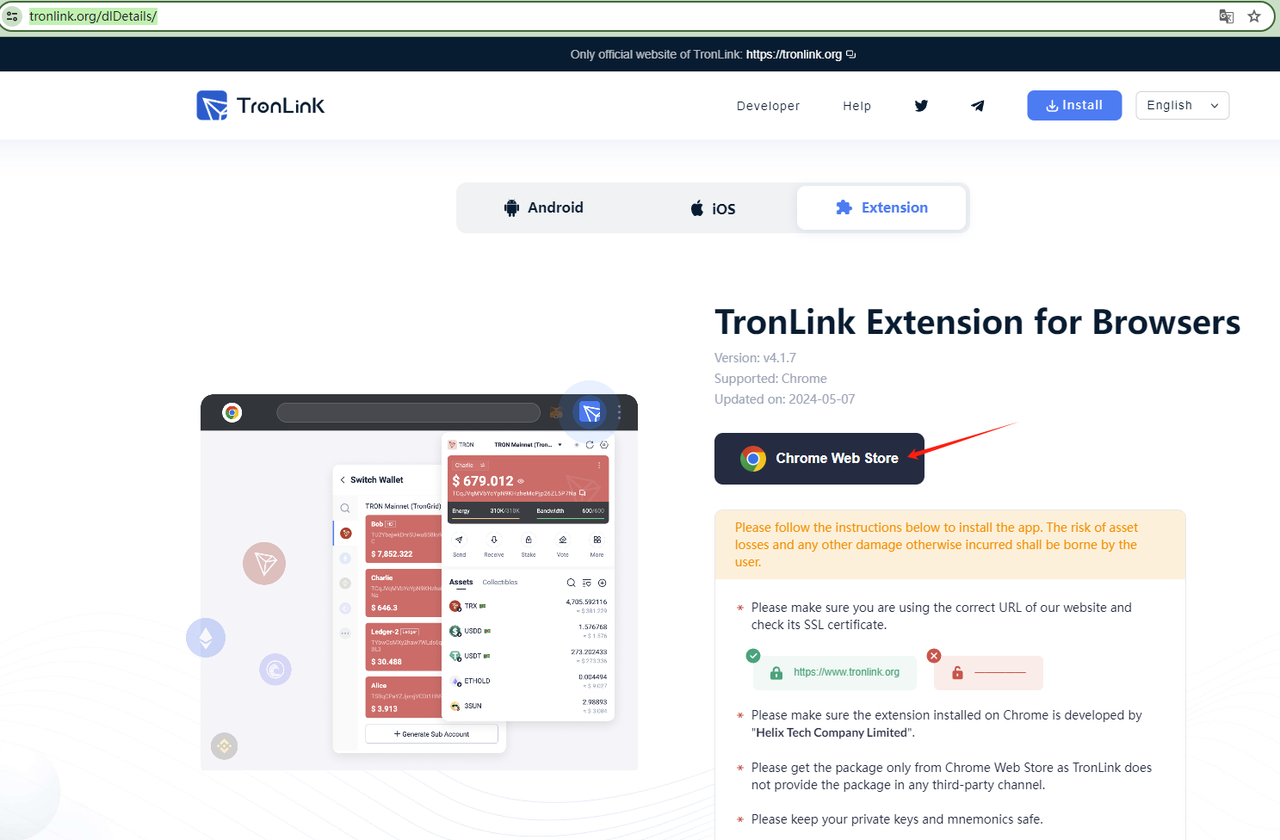
2.1 Go to the TronLink official website, select the Plugin tab, and click the button Chrome Web Store button.
-
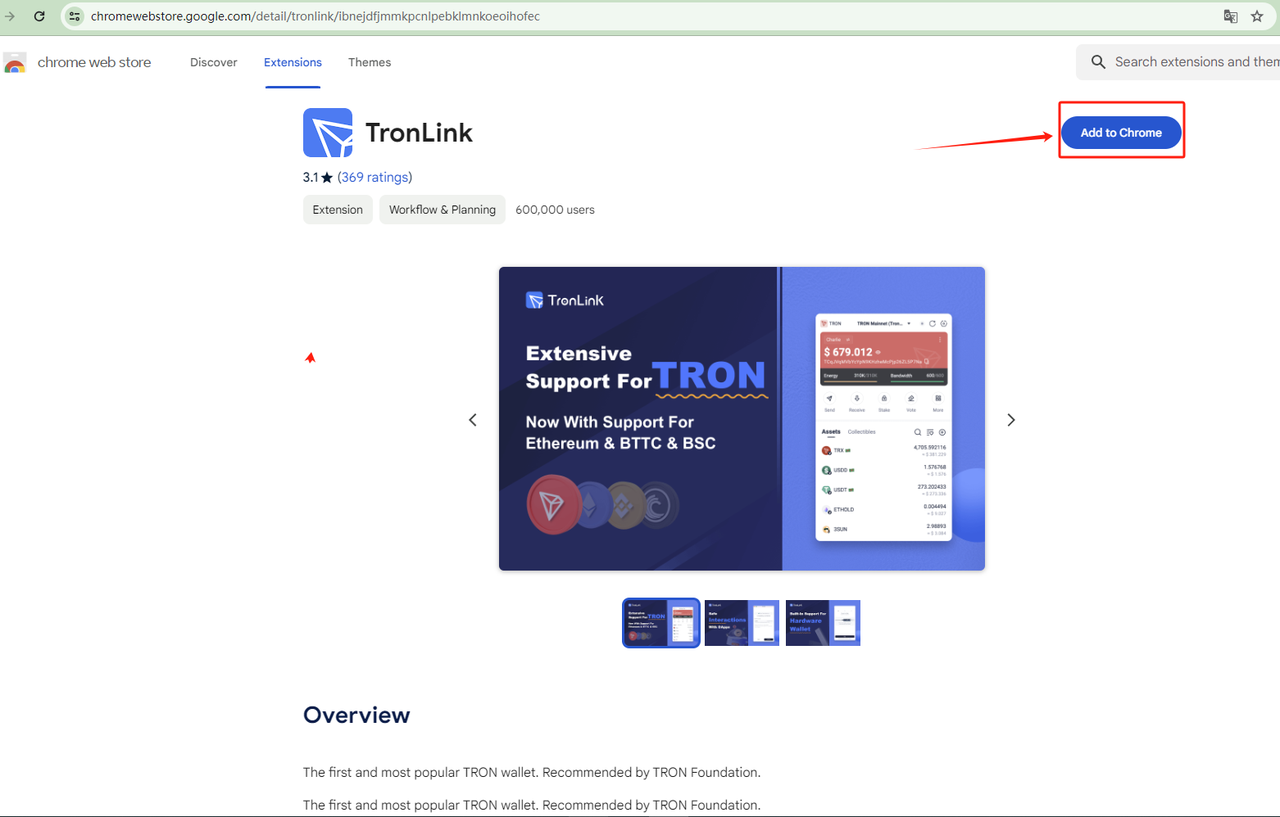
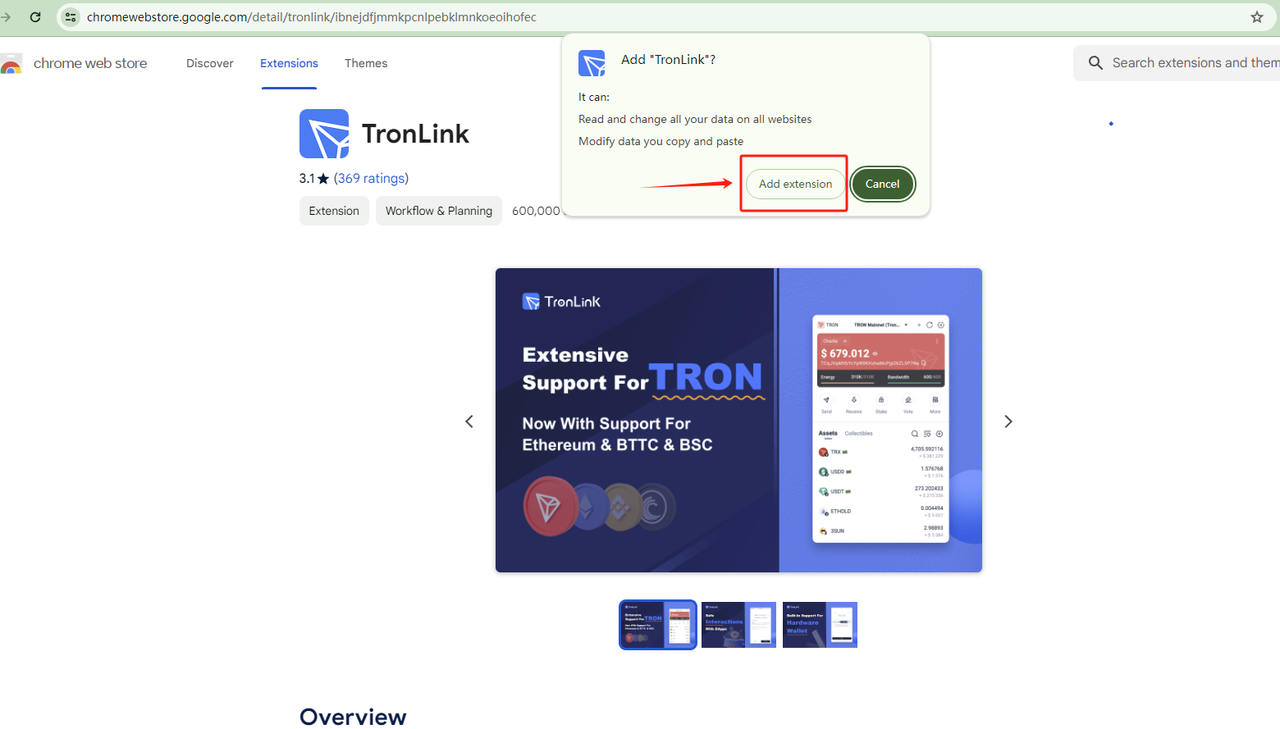
2.2 Click the Add to Chrome button, a confirmation dialog will appear. Click the Add extension button to install the TronLink wallet plugin in Chrome browser.
-
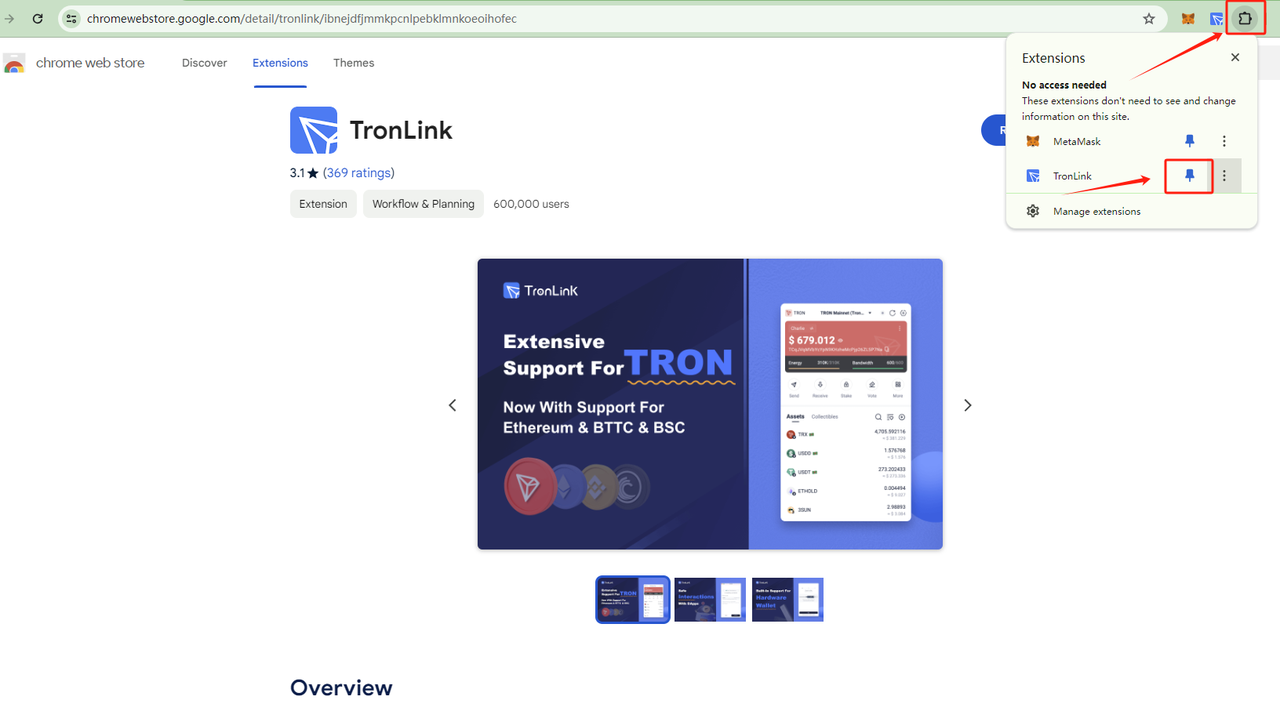
2.3 After the installation is complete, the TronLink wallet will appear in the browser's extension area on the top right corner. Pin the extension for easy access.
Wallet Creation
-
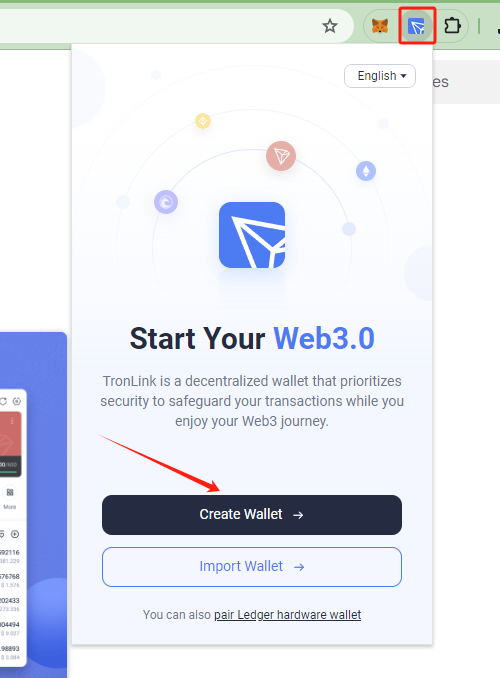
Click the TronLink wallet icon. If you already have a Web3 wallet, you can click Import Wallet to import your personal wallet address into TronLink. If you don't have a wallet yet, click Create Wallet to create a new wallet address.
-
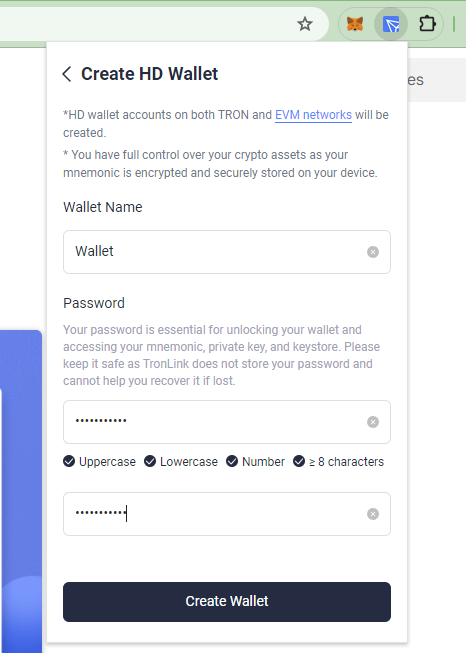
After agreeing to the terms of use, set an account name and a local password, then click the Create Wallet button to complete the creation.
-
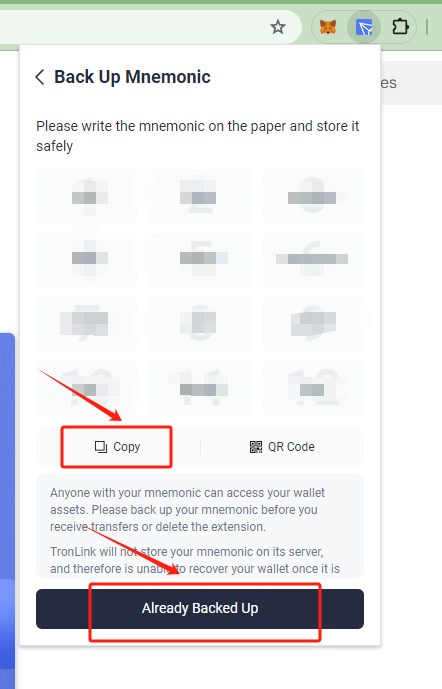
After the creation is successful, click Backup Wallet and follow the prompts to back up the mnemonic phrase (12 English words). The mnemonic phrase is the only credential for wallet recovery, so please keep it safe and do not disclose it to others. Once lost, it cannot be recovered, and any loss will be your responsibility.
-
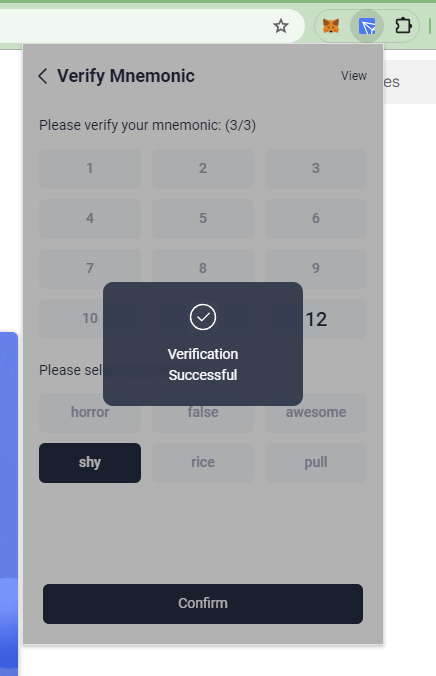
After backing up, click Already Backed Up to enter the mnemonic phrase verification page. Click your mnemonic phrase in the correct order to verify it. Once verified successfully, the wallet creation is complete.
-
Congratulations! Your TronLink wallet plugin account creation is complete.
Wallet Usage
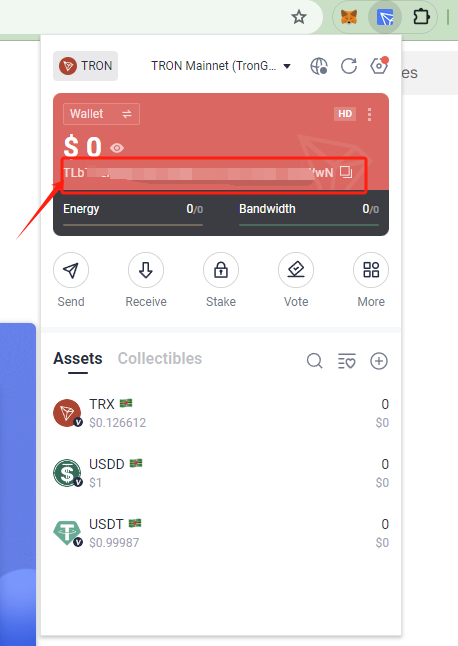
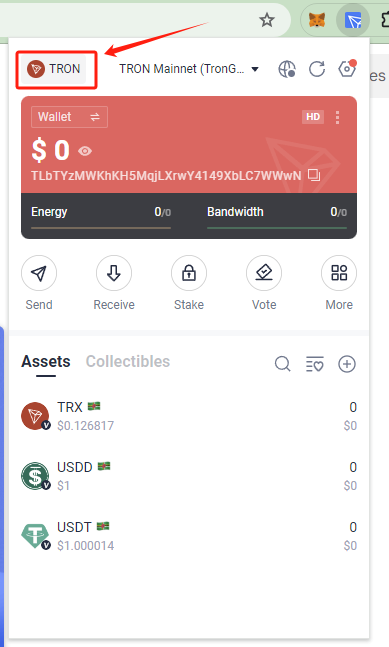
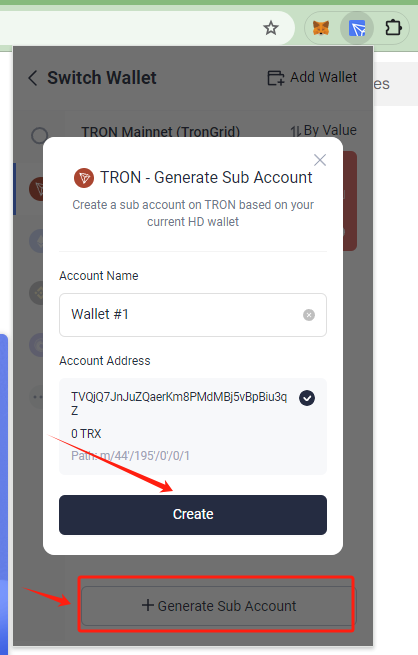
Creating Multiple Addresses
Click the button in the top left corner of the wallet interface to enter the wallet switching page. Click the Generate Sub Account button at the bottom to create a new wallet address.
TronLink Official Help Center
For more information on using the TronLink wallet, you can visit the TronLink Official Help Center.
imToken Wallet
Download and Install imToken App
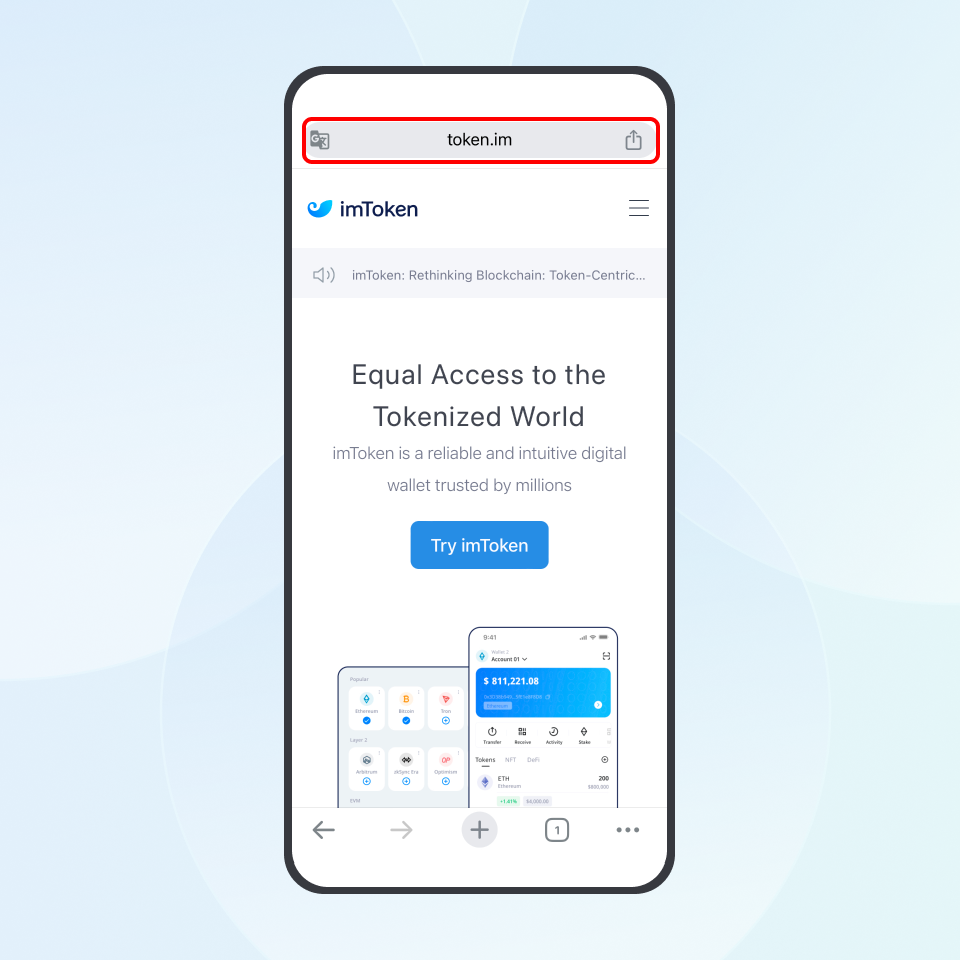
Visit the imToken official website at https://token.im and click "Try imToken". Depending on your device, you can download the Android APK, or install imToken from Google Play or the App Store.
Create a Wallet and Add a Tron Account
-
Open imToken and tap "Create new wallet".
-
Set the wallet name, password, password hint, and other information, then confirm the Terms of Service.
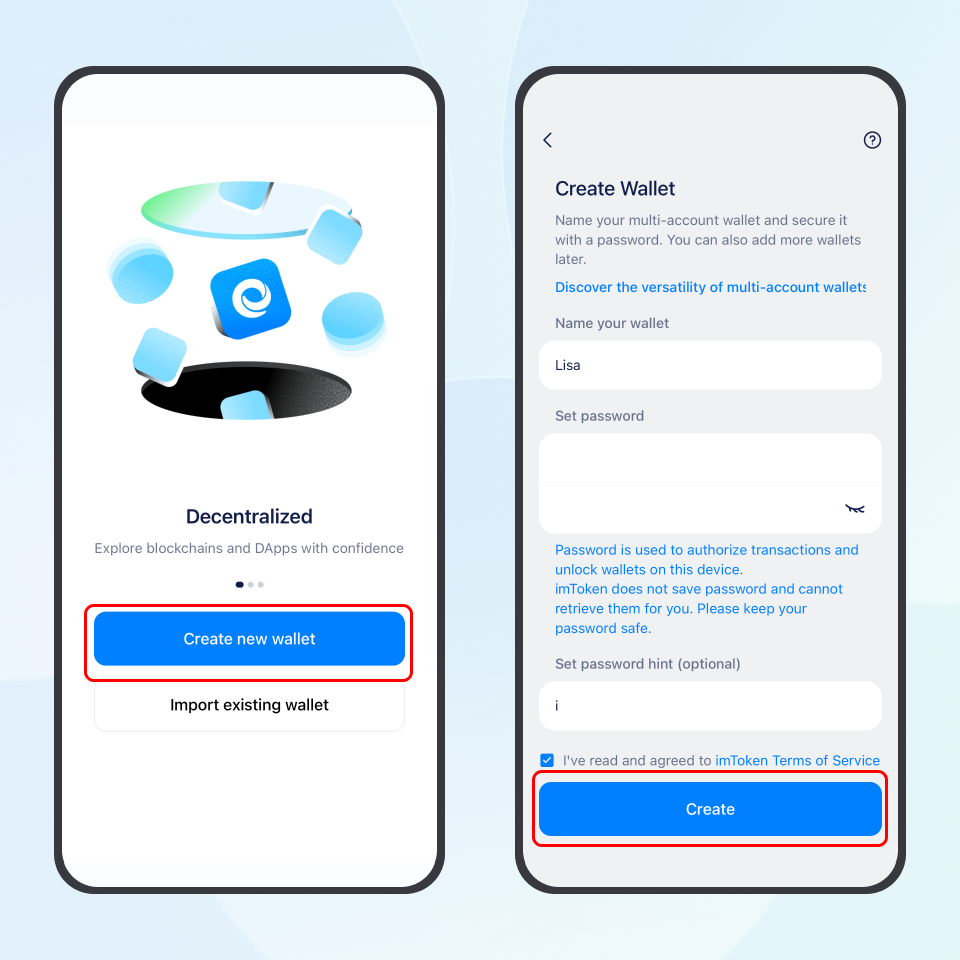 note
noteThe wallet password is used as your transaction password. Please keep it safe.
-
Add accounts for different networks. Tap "Add accounts Now", then select the networks where the tokens you want to receive or manage are issued.
For example, if you want to manage tokens on the Tron (TRC20) network, select Tron.

-
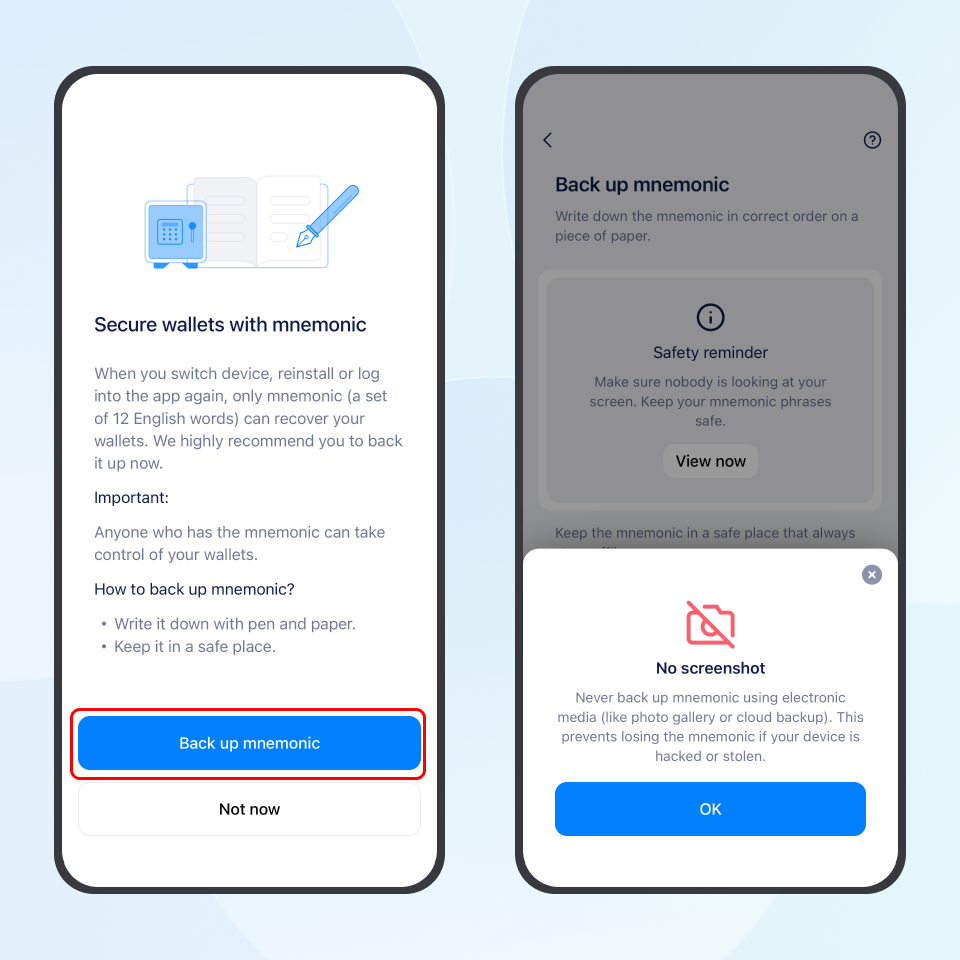
Back up your mnemonic phrase according to the security prompts.
warningYour mnemonic phrase represents control over your assets. If it is lost or leaked, your assets may be lost or stolen. Please write it down on paper and keep it safe. Do not take screenshots, photos, copy it to the clipboard, save it to cloud storage / chat apps / email, or share it with anyone.
-
Tap the words in the correct order to double check your mnemonic phrase and make sure the backup is correct.
-
Done! After the wallet is created, you will be taken to the homepage of the newly added Tron account.
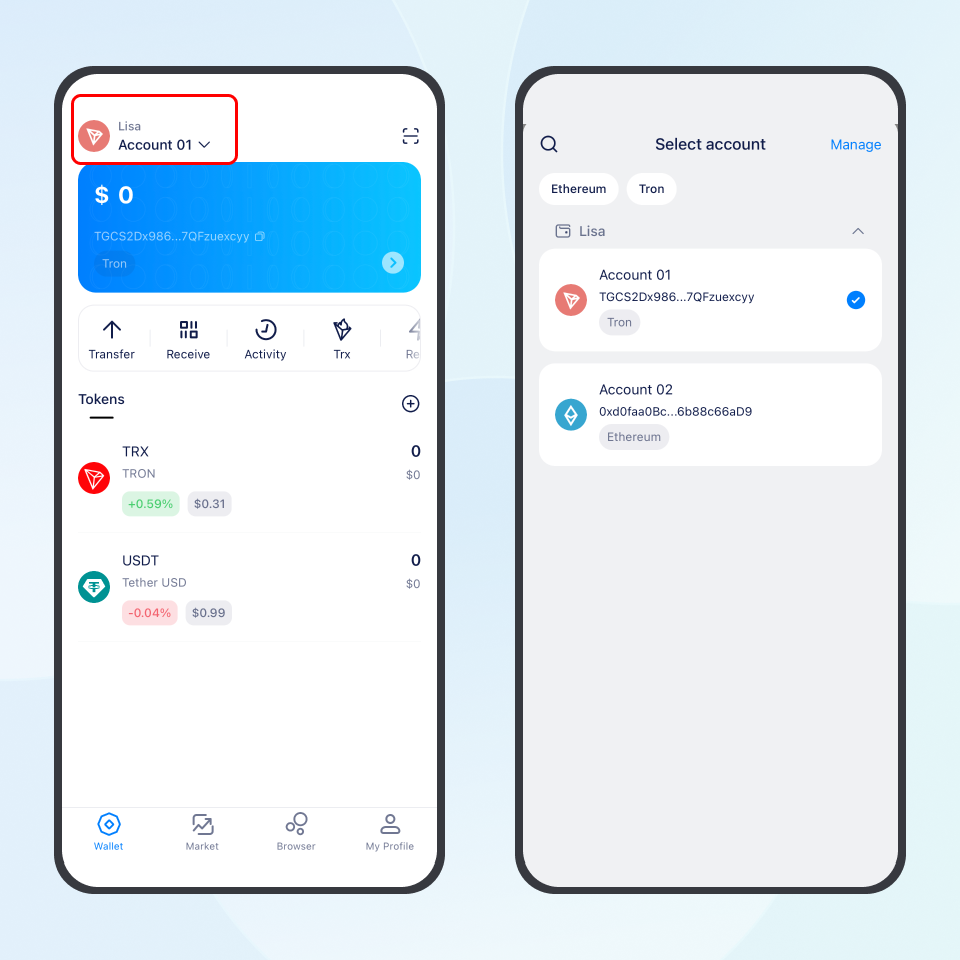
View and Switch Accounts
On the wallet homepage, tap the account selection button in the upper left corner to enter the "Select Account" page. There, you can view the accounts you have added and switch to another account.
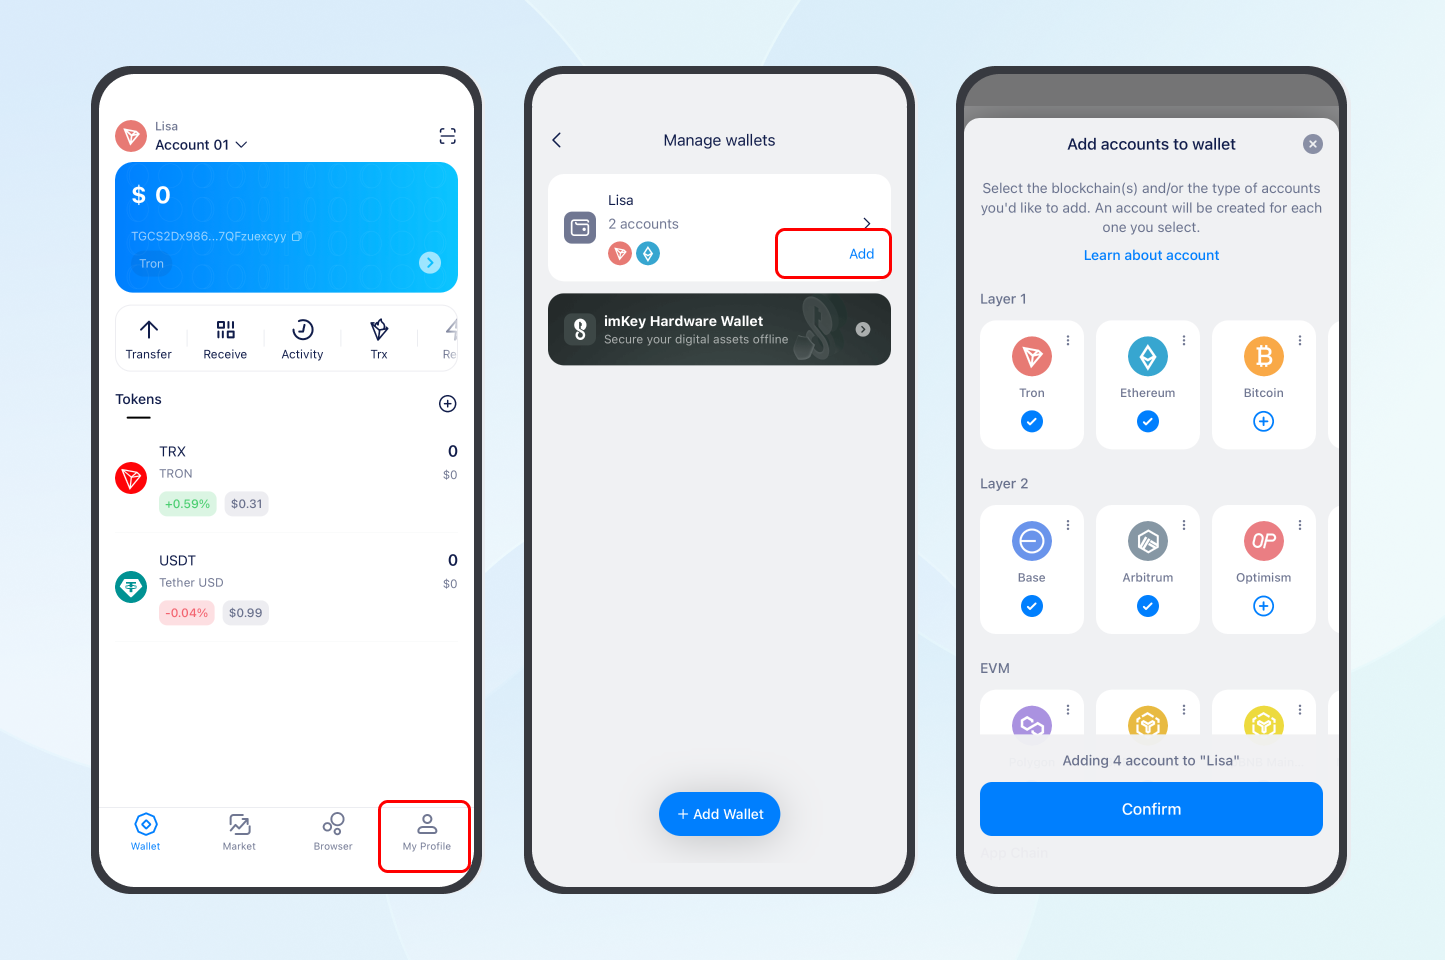
Add More Accounts
If you want to manage more accounts under the current wallet, which uses the same mnemonic phrase, go to "My Profile" - "Manage wallets". Tap "Add" on the right side of the current wallet, then select the network accounts you need, such as Tron, Ethereum, Bitcoin, and more.
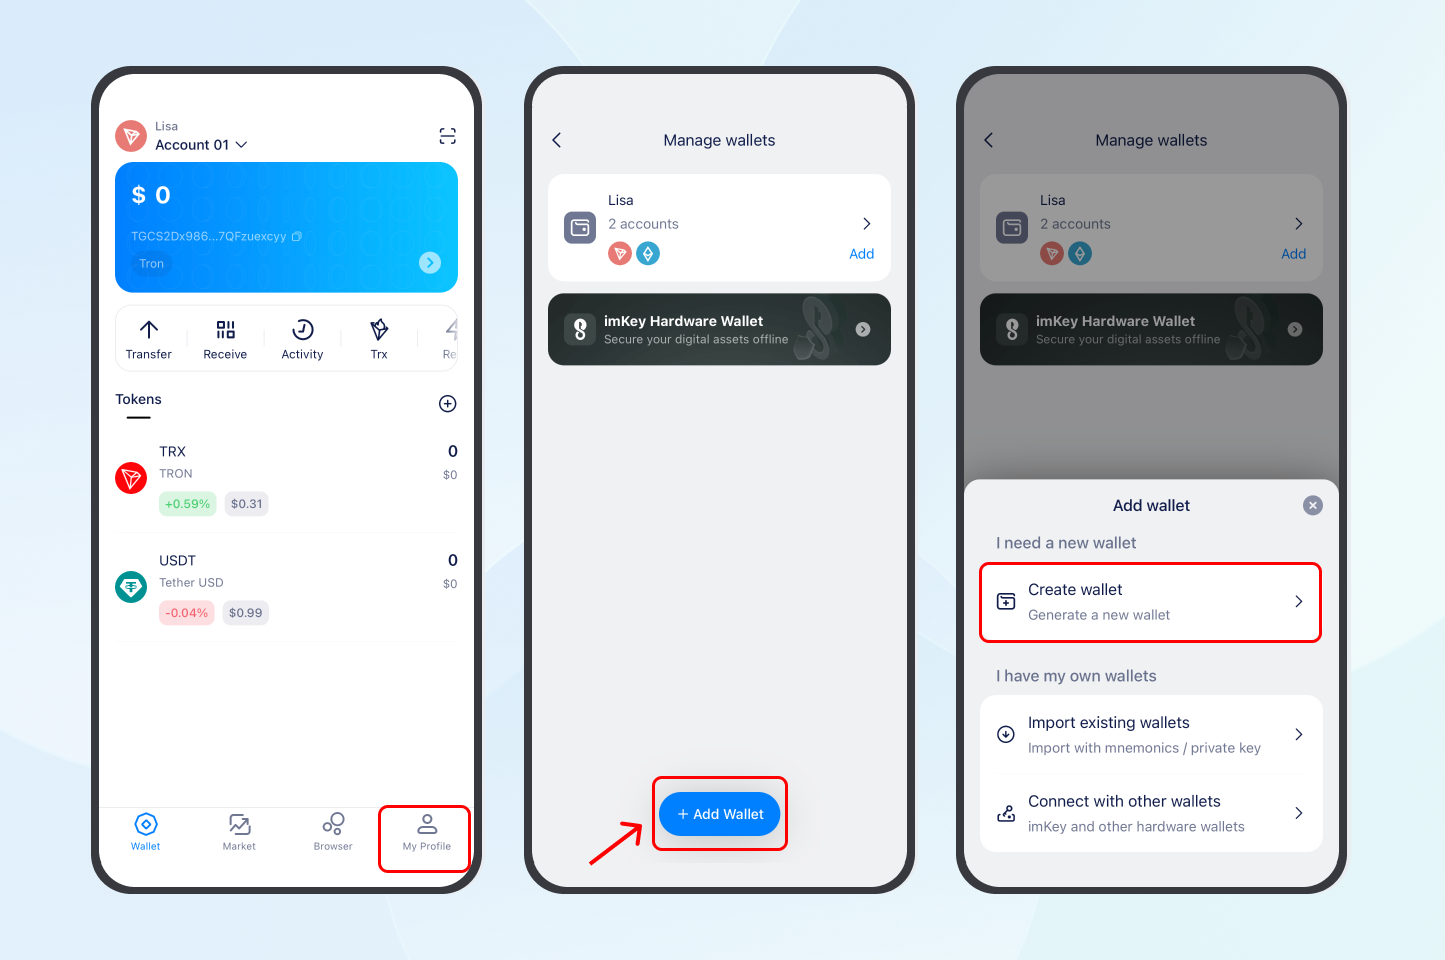
Create More Wallets
If you want to create a new wallet with a new mnemonic phrase, go to "My Profile" - "Manage wallets", tap "+ Add Wallet" at the bottom of the page, select "Create wallet", then follow the steps above to complete the setup and backup.
imToken Official Help Center
For more information on using the imToken wallet, you can visit:
- How to download imToken safely?
- Why is it so important to back up your mnemonic phrase?
- How to safely back up your wallet mnemonic phrase?
- Simplified TRON USDT Transfers with One-Click Energy Rental
MetaMask Official Help Center
For installation and usage instructions of the MetaMask wallet, you can refer to the MetaMask Official Tutorial.